A vintage picture frame can transform any photo or art print into a statement piece — and you do not need to spend a fortune to get one. By embossing a flat aluminum baking pan with a stylus, you can create an ornate, antique-silver vintage picture frame that rivals expensive store-bought options for roughly $12 to $25 in materials. This technique, rooted in a metalworking method called repoussé, produces raised decorative patterns on malleable aluminum that look remarkably like aged silver or pewter.
Below you will find a full materials list with current US price ranges, five numbered step-by-step instructions with time estimates, paint and finish comparisons, common mistakes to avoid, and multiple ways to display your finished vintage picture frame. Whether you want a single accent piece or a full gallery wall, this project delivers high-end looks on a dollar-store budget.
Why Make Your Own Vintage Picture Frame from Aluminum
Authentic antique picture frames sell for $30 to $200 or more depending on size, condition, and ornamentation. A DIY vintage picture frame made from an aluminum baking pan costs a fraction of that. The aluminum is soft enough to accept detailed embossed designs yet rigid enough to hold its shape on a wall or shelf. You control the size, the pattern, and the finish color — something off-the-shelf frames rarely offer.
This project also works well for renters or anyone decorating on a tight budget. You can produce multiple vintage picture frame pieces in a single afternoon, each one unique. The materials are available at dollar stores, craft shops, and online retailers, so there is no specialty sourcing involved.
Materials You Need for a DIY Vintage Picture Frame
Gather everything before you start. Here is the full list with typical US price ranges (they vary by store and region):
| Material | Estimated US Price | Where to Find |
|---|---|---|
| Aluminum baking pan (cake or stuffing size) | $1–$2 | Dollar Tree, Walmart, grocery stores |
| Embossing stylus set (ball-tip tools) | $8–$15 | Amazon, Michaels, Hobby Lobby |
| Acrylic paint (black, silver, gold, or bronze) | $2–$5 per bottle | Walmart, craft stores |
| Craft mat or thick cardboard | $0–$5 | Dollar stores, recycled from packaging |
| Scissors or craft knife | $1–$8 | Already in most craft kits |
| Printed frame template | Free | Search “printable vintage frame designs” online |
| Painter’s tape | $2–$4 | Hardware or dollar stores |
| Dish towel or stiff card | $0 | From your kitchen |
Total project cost: roughly $12–$25 if you buy a stylus set and paint, and as little as $3–$6 if you already own tools and craft paint. A single aluminum pan yields one vintage picture frame in a standard size.
Choosing the Right Aluminum Pan for Your Vintage Picture Frame
Use a flat-bottomed pan — rectangular cake pans and roasting pans work best because they provide the largest uninterrupted surface. Avoid pans with deep ridges or textured bottoms; those patterns will interfere with your embossed design. The thinner the aluminum, the easier it is to emboss, but extremely thin foil pans can tear. A mid-weight disposable pan from a dollar store hits the sweet spot for a vintage picture frame project.
How to Make Vintage Picture Frames: Step-by-Step
Difficulty: 2 out of 5 (beginner). Skills needed: tracing with steady pressure and cutting with scissors. Total time: about 45–90 minutes, plus 30–60 minutes of drying if you add sealer or several coats.
Step 1: Flatten the Aluminum Pan (5 Minutes)
Use a pan with a flat bottom panel — most disposable rectangular cake or roasting pans have one. Cut the raised walls off using sturdy scissors, keeping only the flat bottom panel. According to Hunker, this flat piece should then be smoothed with a dish towel or the edge of a stiff card, pressing out any bends or warps. Take your time here — a flat surface is critical for clean embossing on your vintage picture frame blank.
Step 2: Choose and Print a Frame Template (5–10 Minutes)
Free printable vintage frame designs are widely available online, according to Hunker. Search for “printable rococo frame template” or “printable ornate frame outline” and select one that fits your pan size. Print the template at the correct scale for your target photo size:
- 4×6 photo: template outer dimensions about 6.5×8.5 inches
- 5×7 photo: template outer dimensions about 7.5×9.5 inches
- 8×10 photo: requires a large pan; template outer dimensions about 10.5×12.5 inches
Check the scale by measuring the printed template against your photo before transferring anything to metal. An incorrectly sized template wastes an entire aluminum panel and your time on the vintage picture frame.
Step 3: Tape the Template and Trace the Design (15–25 Minutes)
Place the aluminum on a soft pad — a folded dish towel, a mouse pad, or a piece of craft foam works well. Tape the printed template face-up on top of the aluminum using painter’s tape at each corner. Using an embossing stylus — or a dead ballpoint pen or a dull pencil — trace firmly over every line of the design. The stylus pushes the aluminum down into the soft surface beneath, creating raised lines on the reverse side. This technique is a form of repoussé, according to Hunker.
Work slowly and maintain even pressure to create a consistent vintage picture frame pattern. Note: if you trace on a hard table surface instead of a soft pad, the lines will be flat and shallow rather than raised. Also note that any text or asymmetric design in the template will appear mirrored when you flip the metal to view the raised side, so choose symmetrical decorative designs where possible.
For best results, trace the outer frame border first, then move inward to the decorative scrolls and details. If your design includes floral or leaf motifs, use the wider ball end of the stylus for broader areas and the fine tip for thin lines.
Step 4: Cut Out the Frame Shape (5–10 Minutes)
Remove the template. Flip the aluminum over to see the raised design — you will notice your vintage picture frame pattern emerging from the metal surface. Using sharp scissors or a craft knife, carefully cut along the outer border of the frame. Then cut out the center opening where the photo will show through.
Safety note: cut aluminum edges are sharp. Wear light work gloves or handle edges carefully. You can fold the cut edges under by about 1/8 inch to blunt them, or cover them with painter’s tape temporarily until the vintage picture frame is mounted.
Step 5: Paint and Finish the Frame (15–30 Minutes Plus Drying)
Apply paint to give your vintage picture frame its antique character. See the paint comparison section below for options. A common approach is to coat the entire surface in black acrylic, let it dry for 15 to 20 minutes, then lightly buff the raised embossed areas with a dry cloth to reveal the silver aluminum beneath. This creates a dark-patina effect that mimics aged silver.
Alternatively, brush on gold or bronze acrylic paint for a warmer, antique gold vintage picture frame look. Two thin coats produce better adhesion than one thick coat on aluminum. Let each coat dry completely before handling. Total time for this step, including drying between coats and a final sealer coat, is typically 30–60 minutes. Total project time: about 45–90 minutes of hands-on work, plus drying if you add sealer or several coats.
DIY Antique Picture Frame: Paint and Finish Comparison
Not every paint sticks well to aluminum. Before painting, wipe the aluminum with rubbing alcohol or a little vinegar and let it dry; for best adhesion, lightly scuff the surface with fine sandpaper or use a metal primer, and seal acrylic with a clear acrylic sealer once dry. Acrylic and metal-rated spray paints are the most reliable choices for aluminum; tempera can work only if you seal it. Here is how the main options compare for your vintage picture frame finish:
| Paint Type | Adhesion to Aluminum | Finish Look | Price Range | Best For |
|---|---|---|---|---|
| Acrylic craft paint | Good — bonds well after surface prep and drying | Matte or satin; blends smoothly | $2–$5 per bottle | Detailed buffing and patina effects |
| Tempera paint | Poor to moderate — rubs off and chips; seal it | Matte; opaque coverage | $1–$3 per bottle | Quick kids’ projects or temporary décor |
| Metallic spray paint (for metal) | Excellent — designed for metal surfaces | Glossy or hammered metallic | $5–$10 per can | Uniform antique gold or bronze finish |
| Nail polish or enamel | Fair — thick, slow to dry | High gloss; limited color control | $2–$8 | Small accent details only |
For a convincing DIY antique picture frame, acrylic paint with a dry-brush buffing step delivers the most realistic aged-metal appearance. Spray paint is faster but harder to control for the selective patina look. Tempera works in a pinch but must be sealed with a clear acrylic spray to prevent flaking on your vintage picture frame. For a warm vintage look, use metallic gold or bronze acrylic paint, or apply a bronze spray paint over a black base coat.
DIY Old Picture Frame Ideas: 5 Display Methods
Once your embossed vintage picture frame is painted and dry, you have several ways to show it off. Here is a quick comparison of each method:
| Method | Wall Damage | Effort | Best For |
|---|---|---|---|
| Nest inside a modern frame | Minimal (one hook) | Low | Renters, layered look |
| Mount on fabric backing | One hook | Medium | Soft, textured backdrop |
| Ribbon wall art strip | One hook or rod | Low | Casual, curated hallways |
| Pendant gallery arrangement | One rod mount | Medium | Living or dining room accent |
| Easel or shelf display | None | Very low | Renters, mantels, shelves |
1. Nest Inside a Modern Frame
According to Hunker, the finished DIY vintage picture frame can be styled inside a simple modern black frame to create a layered look. Place your aluminum frame on top of the photo, behind the glass of a larger frame, so the glass protects the metal edges. The contrast between the sleek outer frame and the ornate aluminum centerpiece draws the eye and adds depth. This is also the easiest method because the modern frame handles all the mounting.
2. Mount on Fabric Backing
Glue your vintage picture frame onto a piece of stretched linen, burlap, or velvet using strong craft adhesive. The fabric gives a soft backdrop that enhances the metallic embossing. Stretch the fabric over a small canvas or foam board first, then center and attach the frame. Hang the fabric panel with standard picture hooks.
3. Ribbon Wall Art Strip
Suspend multiple small vintage picture frame pieces from a decorative ribbon hung horizontally along a wall. Use small binder clips or mini clothespins to attach each frame to the ribbon. This works well in hallways, above desks, or in bedroom reading nooks where you want a casual, curated feel.
4. Pendant Gallery Arrangement
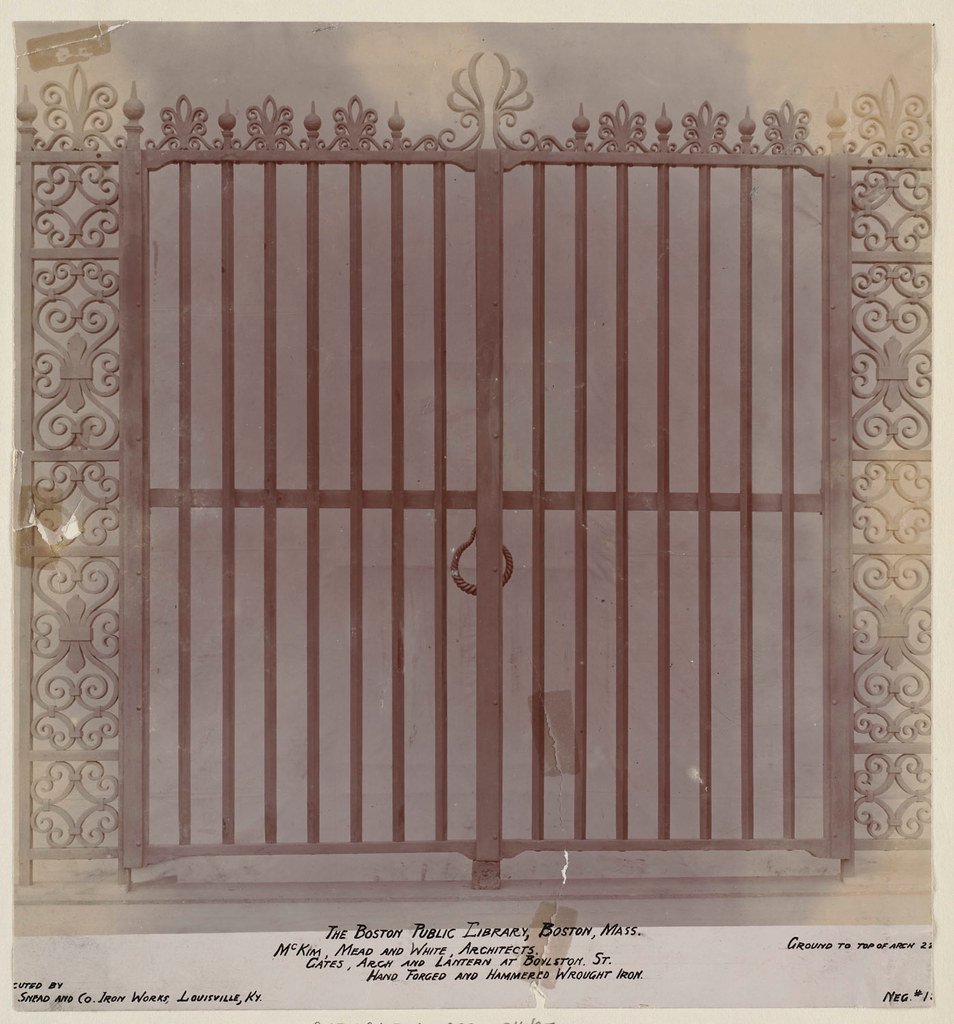
Hang three to five vintage picture frame pieces at staggered heights from individual ribbons or cords attached to a single curtain rod, branch, or dowel mounted above. The pendant style suits living room walls and dining room accent areas. Varying the frame sizes and paint colors within the same metallic family — silver, pewter, gunmetal — creates visual interest without clashing.
5. Easel or Shelf Display
Prop a single vintage picture frame on a small easel, plate stand, or floating shelf. This is ideal for renters who cannot put holes in walls. Lean the frame against a stack of books on a mantel or bookshelf for an effortless layered arrangement. A small battery-operated LED puck light placed behind or beside the frame adds a subtle spotlight effect in the evening. Use battery-operated LED lights only and keep them off any heat source.
How to Make a Frame Look Vintage: Aging Techniques
The embossing itself gives your vintage picture frame an antique quality, but you can push the aged look further with a few finishing tricks:
- Black wash patina: Thin black acrylic paint with water at a 1:3 ratio. Brush liberally over the frame, then immediately wipe off the high points with a soft cloth. The black settles into embossed grooves, simulating decades of tarnish on the vintage picture frame.
- Dry brushing: Dip a stiff brush lightly in gold or bronze paint, dab most of it onto a paper towel, then drag the nearly dry brush across the surface. Paint catches only on raised areas, creating highlights that mimic worn gilding on an old vintage picture frame.
- Verdigris effect: Mix a small amount of green and turquoise acrylic paint. Dab it sparingly into crevices and corners of the vintage picture frame with a sponge. This imitates the oxidized copper patina seen on very old metalwork.
- Sanding: Lightly sand painted edges with fine-grit sandpaper (220-grit) to reveal the aluminum underneath. This simulates natural wear on a vintage picture frame that has been handled over many years.
Combine two or three of these techniques for the most convincing result. A black wash followed by gold dry brushing is a reliable combination that works on nearly any vintage picture frame design.
Make Your Own Vintage Picture Frame: Common Mistakes to Avoid
Even simple projects go sideways without a heads-up. Here are the most frequent problems people run into when making a vintage picture frame from aluminum:
- Pressing too hard while tracing: Aluminum baking pans are thin. Excessive stylus pressure tears the metal, ruining the design. Use firm, steady pressure — you should feel the aluminum deform but not puncture.
- Skipping the flattening step: If the pan bottom still has curves or bends when you start embossing, the vintage picture frame design will warp unevenly. Flatten thoroughly before taping down your template.
- Using paint that does not adhere to metal: Watercolor, chalk paint, and some craft paints bead up on aluminum. Stick to acrylic (on a cleaned, lightly scuffed surface) or metal-rated spray paint. Avoid watercolor and chalk paint, and seal tempera if you use it.
- Cutting the center hole before embossing: The aluminum needs full structural support during the tracing step. Cut the center opening only after all embossing is complete.
- Printing the template at the wrong scale: Browser print settings sometimes auto-resize PDFs. Always select “actual size” or “100%” in the print dialog. Measure the printout against your photo before transferring the design to your vintage picture frame blank.
Scaling Your Vintage Picture Frame for Standard Photo Sizes
Getting the proportions right matters. Most disposable pans are about 9×13 inches, which leaves a flat bottom of roughly 8×12 inches after trimming. That is enough for 4×6 and 5×7 frames, but an 8×10 frame needs a larger roasting pan with a 10×13 inch or bigger flat bottom, or the cardboard-and-foil method below. Check your pan’s flat area before printing. Here is a quick reference for matching your vintage picture frame opening to common photo sizes:
| Photo Size | Frame Opening (Cut Size) | Minimum Pan Bottom Needed | Border Width |
|---|---|---|---|
| 4×6 inches | 3.75×5.75 inches | about 6.5×8.5 inches | ~1.25 inches |
| 5×7 inches | 4.75×6.75 inches | about 7.5×9.5 inches | ~1.25 inches |
| 8×10 inches | 7.75×9.75 inches | about 10.5×12.5 inches | ~1.25 inches |
Cut the center opening about 1/8 inch smaller than the photo on each side so the vintage picture frame overlaps the photo edge slightly. This keeps the photo from slipping through and hides any uneven border cuts.
Cardboard DIY Vintage Photo Frame Alternative
If aluminum feels intimidating, you can achieve a similar vintage picture frame look using heavy cardboard or chipboard. Cut the frame shape from corrugated cardboard, then glue aluminum foil smoothly over the surface. Emboss through the foil with the same stylus technique. The cardboard provides a sturdier base, and the foil layer still accepts detailed designs.
This cardboard DIY vintage photo frame method is also better for very large frames — 11×14 or bigger — where a single baking pan would not provide enough material. Overlap foil sheets slightly and smooth the seams before embossing across them. Paint and finish exactly as you would a pan-based vintage picture frame.
DIY Old Window Picture Frame: A Rustic Variation
Another popular approach to a vintage picture frame is repurposing a salvaged old window sash. Small multi-pane windows from architectural salvage shops or flea markets already have divided sections that work perfectly as photo frames. Clean the glass, tape photos to the back of each pane, and leave the chipped paint and weathered wood as-is for authentic character.
Combine both techniques by mounting your embossed aluminum vintage picture frame onto one pane of a salvaged window while leaving other panes with simple photos or mirrors. The mix of textures — rough wood, smooth glass, embossed metal — creates a gallery-quality display from entirely reclaimed or inexpensive materials. Check furniture and décor ideas for more ways to style salvaged pieces alongside handmade frames.
DIY Vintage Doily Picture Frame Variation
For a softer, more feminine aesthetic, press a real lace doily onto the aluminum instead of a printed template. Lay the doily flat on the aluminum surface, tape it in place, and trace the lace pattern with your stylus. The intricate holes and loops of the doily transfer beautifully to metal, producing a vintage picture frame with a delicate, heirloom quality.
Choose a doily that is slightly larger than your desired frame opening. After embossing, cut out the center and outer border as usual. Paint with a soft ivory or champagne metallic for a vintage picture frame that suits shabby-chic or cottage-style rooms. This DIY vintage doily picture frame approach adds a personal, handcrafted touch that store-bought frames simply cannot replicate.
Safety Notes for Working with Aluminum
This project involves cutting thin metal, so basic precautions are worthwhile:
- Wear light work gloves or gardening gloves when cutting and handling raw aluminum edges for your vintage picture frame.
- Work on a craft mat, cutting board, or thick cardboard to protect tables and countertops from stylus pressure and blade marks.
- Keep cut aluminum scraps contained — small shiny pieces are easy to lose on a floor and painful to step on.
- If you use spray paint on your vintage picture frame, work outdoors or in a well-ventilated garage. Spray paint fumes should not be inhaled in enclosed spaces.
- Young children should not handle cut aluminum edges. An adult should do all cutting, and children can safely participate in the embossing and painting steps of the vintage picture frame project.
Real-Life Example: A Budget Gallery Wall on a Renter’s Timeline
Here is an illustrative example: Picture Maya, a college student moving into a new apartment with bare white walls and a tight decorating budget. She could not afford matching vintage picture frame sets, which often cost $60 or more at the home décor stores she checked. Instead, she picked up four aluminum baking pans at a dollar store for $4 total and printed free ornate frame templates from a craft blog.
Over a single Saturday afternoon — about three hours including drying time — Maya embossed and painted four vintage picture frame pieces in different sizes. She used black acrylic with gold dry-brushing on two and plain silver on the other two. She nested each inside inexpensive black frames from a thrift store at $2 each and hung them in an asymmetric cluster above her desk.
Total cost came to roughly $12 for pans and thrift frames, plus about $10–$15 for a stylus set and paint she bought once, so around $25 for a four-frame gallery wall. The lesson: a vintage picture frame does not need to be genuinely old or genuinely expensive to look polished. Dollar-store aluminum, patience, and a free template go a long way.
Frequently Asked Questions
How to Make Vintage Picture Frames?
Start with a flattened aluminum baking pan, tape a printed ornate frame template to the surface, and trace the design with an embossing stylus to create raised patterns. Cut out the outer shape and center opening, then paint with acrylic in black, silver, or gold. Buff raised areas to reveal the aluminum underneath for an aged vintage picture frame effect. The full process takes 45 to 90 minutes.
How to Make a Homemade Picture Frame?
The simplest homemade picture frame uses cardboard or foam board cut to size, covered in fabric, foil, or paint. For a metal vintage picture frame, use a disposable aluminum pan — it is inexpensive, easy to emboss, and produces a surprisingly elegant result. Secure your photo behind the frame opening with tape, then mount the finished piece on the wall or prop it on a shelf.
How to Make Old Picture Frames Look New?
Clean the frame thoroughly with a damp cloth, fill any chips or gouges with wood filler or spackling paste, then sand smooth. Apply a fresh coat of paint or stain. For a vintage picture frame that should keep its old character, skip the filler and simply clean and apply a clear wax to protect the existing patina. Regilding with gold leaf or metallic paint refreshes the look without erasing age.
Where to Buy Vintage Picture Frames?
Thrift stores, estate sales, flea markets, and online marketplaces like Etsy and eBay are the most common sources for authentic vintage picture frame pieces. Prices commonly range from about $10 to $50 for small and medium frames and much more for large ornate pieces. Alternatively, making your own vintage picture frame from aluminum often costs under $25 and lets you customize size, pattern, and color.
Can I Make My Own Picture Frame?
Yes. A vintage picture frame from an aluminum baking pan requires no woodworking tools, no miter cuts, and no special skills. The embossing technique is beginner-friendly and forgiving — small inconsistencies in line depth actually enhance the handmade antique appearance. This is one of the most accessible and affordable frame-making methods available for home crafters.
Sources
This article was inspired by an aluminum baking pan frame project featured on Hunker. For more on repoussé and metal embossing techniques, see the Britannica entry on repoussé and the Wikipedia overview of repoussé and chasing. To learn how frames have evolved as decorative objects, read the Wikipedia article on picture frames. Browse additional DIY projects for more budget-friendly home décor ideas.