Creating bottle floral art is an inventive way to transform empty prescription vials into charming, functional wall displays for your home. By mounting cleaned and painted plastic medicine containers onto a decorative wood base, crafters can produce miniature wall-mounted bud vases for under twenty dollars. This project repurposes standard household plastic while providing a customizable hanging accent suitable for entryways, kitchens, and cozy reading nooks.
Most households discard dozens of amber or translucent prescription bottles each year. Crafting custom bottle floral art gives these durable containers a second life instead of sending them directly to a landfill. With a few affordable supplies from local craft shops, anyone can turn everyday medical clutter into personalized wall decor in an afternoon.
Real-Life Example: Crafting Bottle Floral Art From Reclaimed Containers
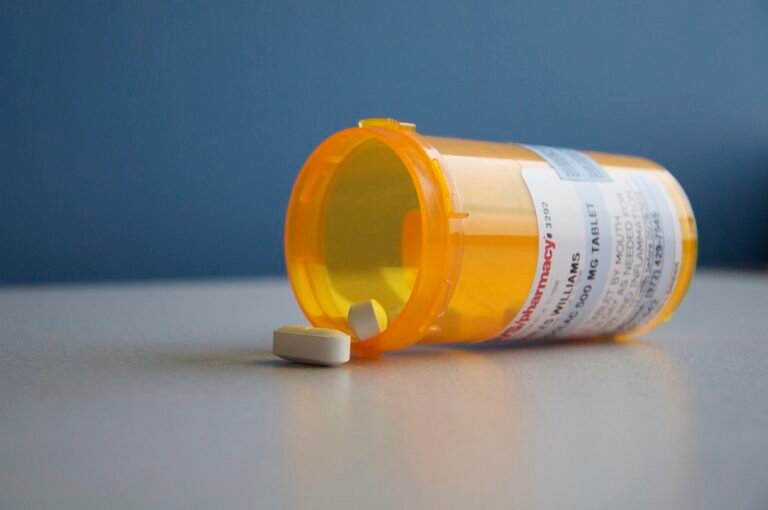
A creative demonstration of bottle floral art comes from craft creator Loli Ds Creations, featured by Hunker. Seeking a practical method to upcycle empty prescription bottles rather than discarding them, the crafter gathered several uniform plastic containers. She removed the prescription labels, cleaned the plastic thoroughly, and trimmed away the protruding plastic locking tabs along the rims using pliers.

After clipping the tabs so each vial would lay completely flat against a wooden plaque, she applied smooth coats of white paint to conceal the pharmaceutical origins. She then wrapped decorative burlap ribbon around each cylinder and secured the mini vases to the wood base using hot glue. Finished with faux flower stems, the completed display produced a polished, rustic wall hanging. The project highlighted how simple household supplies like craft paint, trimmings, and reclaimed plastic can combine into attractive decor without requiring specialized woodworking tools.
The Growing Popularity of DIY Bottle Floral Art
Much of the appeal of bottle floral art lies in its accessibility and sustainability. Small amber medication bottles are manufactured from durable polypropylene plastic. While this plastic is tough, small pharmaceutical containers frequently fall through mechanical sorting screens at municipal recycling facilities.
Following U.S. Environmental Protection Agency waste reduction guidelines by reusing materials at home prevents plastic waste from reaching landfills. Creative upcycling takes discarded items and converts them into higher-value decorative pieces. Making bottle floral art keeps sturdy containers out of the waste stream while adding handmade personality to your interior spaces.
Beyond environmental benefits, these small hanging planters offer remarkable budget value. Comparable store-bought wall sconces with glass bud vases often retail for thirty to fifty dollars at specialty home goods boutiques. Designing your own bottle floral art delivers an identical visual charm for a fraction of that cost, making it ideal for budget-conscious decorators exploring creative DIY projects.
Materials and Cost Breakdown for Bottle Floral Art
Gathering the correct supplies for your bottle floral art ensures your finished wall piece looks intentional and holds up securely over time. Most of the required items can be found around the house or purchased at local craft retailers for modest prices.

A standard bottle floral art assembly requires a sturdy mounting surface, cleaned containers, strong adhesives, and decorative finishes. Investing in quality craft paint and reliable glue produces a polished final piece that looks like boutique home decor rather than recycled packaging.
| Item Description | Estimated US Retail Price | Primary Purpose |
|---|---|---|
| Empty Prescription Vials (3 to 5) | $0.00 (repurposed) | Miniature wall bud vases |
| Unfinished Wood Plaque (6×12 or 8×10 inch) | $3.50 – $10.00 | Structural mounting plaque |
| Multi-Surface Acrylic or Chalk Paint | $2.50 – $5.00 | Base coat for bottles and plaque |
| Heavy-Duty Adhesive (E6000 or Hot Glue) | $4.00 – $7.50 | Securing plastic vases to wood |
| 70% or 91% Isopropyl Rubbing Alcohol | $2.00 – $3.50 | Removing adhesive label residue |
| Faux Floral Stems or Dried Botanicals | $3.00 – $12.00 | Decorative botanical filling |
| Burlap Ribbon, Lace, or Jute Twine | $2.00 – $4.50 | Concealing bottle necks and rims |
| Sawtooth Picture Hanger with Screws | $1.50 – $3.00 | Wall mounting hardware |
When using leftover craft paint, scrap lumber, and ribbons already in your craft stash, the total out-of-pocket expense for bottle floral art is often under eight dollars. Purchasing every item brand new still keeps the overall budget under twenty-five dollars, making bottle floral art an exceptionally thrifty home accent.
Essential Preparation and Safety for Bottle Floral Art
Before assembling your bottle floral art, proper sanitation and surface preparation are required. Medicine containers must be thoroughly sanitized to guarantee they are safe for handling and ready to accept paint.
Start by ensuring that all original medications have been properly disposed of according to FDA medicine disposal instructions. Never flush leftover medication down household drains or leave pills inside containers where children or pets could access them.
Once emptied, submerge the bottles in warm water mixed with dish soap to soften paper labels. Peel off the paper face, then apply rubbing alcohol directly to a cotton pad to wipe away leftover adhesive. Rubbing alcohol breaks down sticky residue instantly without melting the polypropylene surface, giving you a clean base for bottle floral art.
Next, inspect the rim of each bottle. Modern child-resistant prescription bottles feature small locking tabs or flanges along the outer edge. If left intact, these tabs prevent the cylinder from lying flush against the wooden plaque. Take a pair of needle-nose pliers or heavy-duty craft shears and snip the protruding tab flush with the collar. Sand the clipped spot lightly with fine-grit sandpaper.
Finally, give the smooth outer surface of each plastic container a light scuffing with 220-grit sandpaper. Plastic is inherently non-porous, and a gentle abrasion provides the mechanical grip needed for primer and paint to bond securely during your bottle floral art build.
Step-by-Step Guide to Crafting Bottle Floral Art
With clean, trimmed bottles ready, you can assemble your customized wall display. Allocate roughly forty-five to seventy-five minutes for construction, plus drying time between paint applications.

Step 1: Preparing the Wood Base
Select a wooden plaque that complements your room decor. Craft stores sell routed basswood, raw pine slabs, and reclaimed pallet sections that make wonderful bases. Sand any rough edges with 150-grit sandpaper to prevent splinters.
Apply your chosen finish to the wood. You can use wood stain for a rich, natural grain, chalk paint for a vintage farmhouse look, or a clear matte polyurethane sealer. Let the wood dry completely for at least two hours before attaching your bottle floral art components. This wooden backing provides a handsome frame that pairs naturally with home furniture and decor.
Step 2: Priming and Painting the Containers
Pharmaceutical amber plastic has a distinct coloration that can show through thin craft paints. To create an opaque finish for your bottle floral art, apply an initial coat of bonding primer or chalk-style paint directly to the scuffed plastic vials.
Allow the primer to dry for thirty minutes. Follow with two light coats of acrylic craft paint in your preferred shade, such as warm cream, sage green, or matte charcoal. Brushing on multiple thin coats prevents drip marks and creates a smooth, ceramic-like exterior that completely disguises the container origins.
Step 3: Adding Decorative Wraps
Once the paint dries to the touch, add decorative trimmings around the neck and body of each bottle. Wrapping the threaded rim with natural jute twine or thin burlap ribbon hides the screw-top ridges that identify the container as medicine packaging.
Secure the ribbon or twine using small dabs of hot glue on the back side of the cylinder. Adding tactile trimmings enriches the visual texture of your bottle floral art and adds rustic charm to the finished assembly.
Step 4: Planning the Plaque Layout
Lay your finished wood plaque flat on your work surface. Arrange your painted bottles across the board to evaluate spacing before applying any permanent glue. For vertical plaques, arranging three bottles in a centered column looks balanced and symmetrical.
For wide horizontal boards, arranging three to five bottles side by side produces a harmonious row of bud vases. Use a ruler and a light pencil mark to ensure equal distance between each container. Consistent spacing gives bottle floral art a balanced, professional appearance.
Step 5: Securing the Bottles
Adhering smooth plastic to wood requires a dependable bonding agent. A hybrid gluing method works best for mounting bottle floral art. Apply a bead of industrial adhesive like E6000 along the rear vertical spine of the bottle for long-term structural grip.
Add two dabs of high-temperature hot glue at the top and bottom of the spine right next to the industrial glue. The hot glue cools within seconds, holding the vial firmly in place while the industrial adhesive cures over the next twenty-four hours. Press the bottle down onto your pencil mark and hold it firmly for thirty seconds.
Step 6: Attaching Hanging Hardware
Flip the wooden plaque over onto a soft towel to protect the painted bottles. Measure the exact horizontal center of the plaque along the upper third of the reverse side.
Attach a metal sawtooth picture hanger or two small D-rings with short wood screws. Ensure the screws are shorter than the thickness of your plaque so they do not pierce through the front face. Installing sturdy hardware ensures your bottle floral art hangs straight and stable on any wall surface.
Step 7: Arranging Stems and Botanicals
Now comes the most enjoyable phase of your bottle floral art project: adding the floral elements. Trim your faux flowers or dried stems using wire cutters so they stand proportionally above the bottle opening.
As a general design guideline, the visible flower stems should extend approximately one to one-and-a-half times the height of the bottle vase. Overly long stems look top-heavy, while very short stems get lost inside the container. Insert small pieces of florist foam or dried moss inside each vial to anchor individual stems firmly in your preferred arrangement.
Choosing Between Fresh and Faux Flowers for Bottle Floral Art
When styling bottle floral art, decorators must decide between realistic artificial stems, preserved dried florals, or fresh-cut backyard clippings. Each botanical type brings distinct practical advantages and maintenance requirements.
Faux florals and dried botanicals are the easiest option for wall-mounted displays. High-quality silk flowers, faux eucalyptus, dried lavender, and preserved baby’s breath require zero watering and last indefinitely. Because they add minimal weight to the display, they place very little stress on the adhesive joints holding your bottle floral art together.
Fresh flowers offer lovely natural fragrance and seasonal vitality. However, holding water inside the bottles introduces moisture and extra weight. If you plan to add fresh water to your bottle floral art, ensure you seal the inside of the bottle thoroughly and use 100% silicone or waterproof epoxy rather than standard hot glue.
| Feature | Faux & Dried Botanicals | Fresh Clippings with Water |
|---|---|---|
| Water Tightness Needed | No water required | Must hold standing water |
| Weight on Plaque | Extremely lightweight | Moderate weight increase |
| Lifespan | Multiple years without fading | 5 to 10 days per cutting |
| Recommended Glue | High-temp hot glue or E6000 | Waterproof marine epoxy or silicone |
| Maintenance Demands | Occasional light dusting | Regular water changes and trimming |
| Risk of Water Spills | None | Potential dripping during refills |
For most interior wall locations, faux florals or preserved dried botanicals represent the most dependable choice for bottle floral art. They deliver vibrant color year-round without the risk of accidental water damage to your drywall or woodwork.
Three Styling Variations for Custom Bottle Floral Art
One of the best qualities of bottle floral art is its versatility. By altering your paint finishes, wood base, and decorative accents, you can adapt the craft to complement any interior decorating theme.

1. Rustic Farmhouse Aesthetic
To achieve a cozy country look, start with a distressed whitewashed pine plaque. Sand the edges of the wood to reveal the underlying darker grain, creating an authentic weathered appearance. Paint your medicine bottles in matte linen white or soft antique cream.
Wrap the center of each container with a one-inch strip of natural jute burlap and tie a small twine bow around the neck. Fill the miniature vases with dried lavender sprigs, faux cotton bolls, and delicate faux eucalyptus leaves. This rustic variation of bottle floral art complements open shelving, shiplap accent walls, and country dining spaces.
2. Modern Minimalist Design
For clean, contemporary interiors, select a sleek rectangular piece of birch plywood or clear-sealed natural white oak. Leave the wood grain unpainted and apply a simple matte protective wax. Coat your medicine containers in crisp matte black or neutral slate gray paint without adding any ribbons or twine.
Mount the containers in a precise, evenly spaced row. Fill each vessel with a single architectural stem, such as dried bunny tails, bleached pampas grass, or a minimalist dried palm spear. This tailored bottle floral art layout adds sculptural interest to hallways, offices, and streamlined living room walls.
3. Seasonal Holiday Display
If you enjoy updating your decor throughout the year, build a seasonal bottle floral art plaque featuring neutral white or metallic gold vases. Because the base design remains neutral, you can swap out the floral contents to reflect each changing season.
In the spring, insert faux pastel cherry blossoms and faux tulips. In the summer, switch to bright yellow sunflowers and chamomile. For autumn, transition to mini faux oak leaves, burnt-orange berries, and wheat stalks. During the winter holidays, tuck in faux cedar sprigs, mini pinecones, and red holly berries. This versatile bottle floral art installation provides year-round enjoyment with minimal storage demands.
Common Mistakes to Avoid With Bottle Floral Art
While making bottle floral art is straightforward, avoiding a few frequent missteps ensures your project turns out beautifully and remains securely assembled on your wall.
The first mistake is skipping the label removal step and attempting to paint directly over paper prescription stickers. Prescription labels feature slick thermal coatings and raised seams. Paint applied over paper labels will bubble, peel, and leave unsightly outlines. Always take the extra five minutes to strip labels cleanly with rubbing alcohol before priming.
The second pitfall is failing to remove the plastic locking tab along the bottle rim. Even a tiny tab keeps the cylinder from resting flush against the wooden plaque. When the bottle does not sit flush, the glue has only a microscopic contact point, significantly increasing the chance that the vase will pop off the board when bumped.
Another common mistake involves using overly tall or heavy faux flower branches. Tall branches act as levers, pulling the top rim of the bottle away from the wood. Keep stems proportional to the small scale of the containers to preserve the structural balance of your bottle floral art.
Finally, avoid relying solely on low-temperature craft hot glue guns. Low-temperature glue adheres poorly to smooth plastic and can turn brittle in fluctuating indoor temperatures. Always use high-temperature glue sticks combined with a flexible industrial adhesive for a durable, long-lasting bond.
Alternative Bottle Treatments for Bottle Floral Art
If you want to disguise the pharmaceutical shape of the containers entirely, several creative exterior treatments can completely mask the plastic profile.
One popular alternative is wrapping the entire cylinder in tightly wound jute cord or macrame cotton twine. Start at the base of the bottle, applying a spiral bead of hot glue while pressing the cord firmly into place. Continue winding all the way up over the threaded rim. This technique transforms the plastic vial into a fully textured, organic rope bud vase for your bottle floral art.
Another sophisticated option is covering the container with a thin layer of air-dry modeling clay before painting. Roll out a small slab of clay, wrap it around the cylinder, and smooth the seam with damp fingertips. You can carve subtle vertical fluting or geometric patterns into the wet clay. Once dry, paint the piece with textured stone spray paint or terracotta craft paint to achieve an authentic ceramic finish.
You can also mix two tablespoons of baking soda into standard acrylic craft paint. This quick recipe creates a thick, chalky paste that mimics porous earthenware pottery. Applying this mixture with a coarse bristle brush gives your bottle floral art an artisanal pottery finish that hides all plastic seams effortlessly.
Display Care and Longevity for Bottle Floral Art
Handcrafted bottle floral art requires very little ongoing maintenance once hung in your home. Periodic dusting and basic handling precautions will keep your wall decor looking fresh for years to come.
Dust faux flowers and wooden plaques every few weeks using a soft feather duster or a quick blast from a can of compressed computer air. Avoid spraying liquid household cleaners directly onto painted bottles or raw wood plaques, as harsh chemical sprays can dissolve acrylic finishes.
If your display is hung in an entryway or hallway, position it away from direct exterior doors where extreme temperature swings or high humidity could weaken glue bonds. With sensible placement, your custom bottle floral art remains a dependable, eye-catching focal point that brightens your home every day.
Frequently Asked Questions About Bottle Floral Art
Can I use real flowers and water in bottle floral art?
Yes, you can use real flowers with water in bottle floral art, provided you prepare the containers properly. Use 100% waterproof silicone adhesive or industrial epoxy to mount the bottles to the wood plaque, as standard hot glue can soften when exposed to moisture. Fill vials carefully using a small watering pitcher, and wipe away any accidental drips immediately.
What is the best glue to mount plastic prescription bottles to wood?
The most reliable adhesive method for bottle floral art is a combination of high-temperature hot glue and E6000 industrial craft adhesive. The hot glue creates an instant bond that holds the container in place without clamping, while the E6000 cures over twenty-four hours to form a flexible, permanent hold that will not become brittle over time.
How do I remove sticky prescription labels without damaging the plastic?
To remove adhesive labels cleanly for your bottle floral art, soak the vials in warm, soapy water for fifteen minutes to peel away the paper layer. Next, saturate a cotton ball with 91% isopropyl rubbing alcohol and wipe away the leftover adhesive gum. Rubbing alcohol dissolves the adhesive quickly without scratching or softening the plastic container.
How do you stop tall flower stems from falling over inside the bottles?
To keep floral stems arranged neatly inside your bottle floral art vases, cut a small cube of dry floral arrangement foam and push it into the bottom of the bottle. Alternatively, you can drop a teaspoon of coarse craft sand or roll a small ball of floral clay into the base to anchor each stem in position.
Sources: Inspiration and project concept adapted from Hunker. For guidelines on household plastics recycling and safety, consult the EPA and the FDA.