Creating a charming bread box planter is one of the most rewarding ways to repurpose vintage kitchenware into a functional indoor garden. Instead of letting an antique roll-top tin or rustic wooden bin gather dust, you can quickly convert it into an eye-catching centerpiece without drilling holes or ruining its collectible value. By pairing modular nursery pots with hidden drip trays, you protect your container from moisture while giving your houseplants the exact drainage they need to flourish.
Repurposing an unused bread box into a bread box planter allows you to solve two common interior decorating challenges at once: clearing countertop clutter and introducing lively greenery into your home. Vintage bread tins offer generous width and depth, making them ideal containers for grouping multiple companion plants together. Whether you place your completed arrangement on a dining buffet, a sunny breakfast counter, or a living room console, the combination of aged patina and fresh green foliage creates instant visual warmth.
By opting for a modular approach, your bread box planter can hold a versatile mixture of cascading vines, upright architectural foliage, and vibrant textured leaves. The secret lies in setting up your container correctly from day one. In this comprehensive guide, you will learn the complete step-by-step assembly process, find detailed budget breakdowns, compare materials, and discover curated houseplant pairings that thrive in compact tabletop displays.
If you love creative upcycling ideas, explore our full collection of DIY projects and inventive styling tips for your kitchen to spark your next weekend makeover.
Project Snapshot: Bread Box Planter Specifications
Before starting your bread box planter, reviewing the core dimensions, time commitments, and difficulty level helps ensure a smooth, stress-free crafting session. This project is accessible even if you have never potted an indoor plant before.

- Skill Level: Beginner (no specialized woodworking or metalworking tools required).
- Active Project Time: 30 to 45 minutes of hands-on assembly.
- Drying Time: about 2 to 4 hours for a clear spray coat on metal; 24 hours or more for water-based polyurethane on wood, so follow the product label.
- Expected Longevity: Indefinite when using removable drop-in pots and proper moisture barriers.
- Ideal Placement: Kitchen islands, deep windowsill ledges, dining sideboards, or plant shelving.
Assembling a bread box planter takes minimal effort because the structure is already built. Your main responsibility is shielding the interior surface against accidental spills and selecting houseplants that share identical lighting and hydration requirements.
Estimated Costs and Materials for a Bread Box Planter
Building a budget-friendly bread box planter requires only a few inexpensive supplies. If you already own an unused bread box or have propagated houseplant cuttings on hand, your total out-of-pocket expense could be under ten dollars.
- Thrifted vintage tin or wooden bread box for your bread box planter project: $0 to $15 at thrift stores, estate sales, or flea markets.
- Protective clear spray sealer (acrylic or enamel finish): $5 to $8 per can.
- Heavy-duty plastic plant drip saucers or a narrow drip tray: $3 to $10.
- Individual 4-inch or 6-inch plastic nursery pots: $1 to $3 each (or free from recycled nursery stock).
- High-drainage indoor potting mix: $5 to $9 per bag.
- Preserved green sheet moss or Spanish moss: $4 to $7 per bag.
- Small pea gravel or leca clay pebbles: $3 to $6.
- Indoor houseplants (3 to 4 starter plants): $4 to $12 each.
- Water-based polyurethane or clear wood sealer for wooden boxes: about $8 to $15 per small can.
A budget build using a free box, recycled pots and cuttings can cost under $10. A typical full build with new plants and supplies runs about $20 to $55. All prices are approximate US ranges that vary by store and region.
Choosing the Best Material for a Bread Box Planter
Vintage bread boxes primarily come in two distinct materials: stamped tinplate or enameled metal, and solid or laminated wood. Understanding how these materials interact with moisture is essential when building a durable indoor display.

A metal bread box planter brings mid-century or retro farmhouse appeal to any room. Common styles include chrome roll-top bins, painted enameled bread bins, and embossed tin boxes. While metal provides a sturdy frame, raw interior seams can oxidize rapidly when exposed to trapped dampness. Applying a clear coat to your metal bread box planter stops surface rust before it starts, ensuring your vintage treasure retains its structural integrity.
A wooden bread box planter offers warm, rustic charm that fits beautifully into cottage and traditional interiors. However, moisture is the primary enemy of any wooden bread box planter. Untreated wood absorbs ambient water from drainage saucers, resulting in warping, joint separation, and mildew growth. Sealing unfinished interior wood with a water-resistant finish or lining the bottom with a waterproof barrier prevents long-term decay.
Before applying any protective finishes, testing spray sealers on an inconspicuous area of a vintage tin beforehand ensures the coating will not alter or damage the exterior graphic finish. Clear acrylic or enamel sealers from brands like Rust-Oleum or Krylon are common choices; always test on a hidden spot because some can yellow or cloud older finishes.
| Feature | Vintage Metal Bread Box | Vintage Wooden Bread Box |
|---|---|---|
| Primary Vulnerability | Rust, corrosion along folded metal seams | Wood rot, mildew, warping, joint swelling |
| Recommended Sealant | Clear acrylic or enamel spray sealer | Water-based polyurethane, beeswax, or plastic sheet |
| Moisture Barrier Needs | Rigid plastic saucers beneath each pot | Full plastic trough liner plus drip saucers |
| Drilling Drainage Holes | Not recommended; it ruins collectible value and can start rust at the cut edge | Not recommended; it ruins collectible value and lets water reach raw, unsealed wood, which can lead to rot. |
| Ideal Display Style | Farmhouse retro, mid-century modern | Cottagecore, rustic country, traditional |
Comparing container materials helps you tailor your bread box planter to your space and choose the right protective measures. For most collectors, preserving the container without cutting or drilling is the best route.
Drop-In Nursery Pots vs. Direct Planting in a Bread Box Planter
When designing your interior garden, you have two assembly methods: using modular drop-in plastic nursery pots, or filling the entire bread box directly with soil. While direct planting may sound straightforward, it introduces severe risks that can quickly ruin both your plants and your container.
The drop-in method keeps your bread box planter in pristine vintage condition. By housing each plant in its own standard plastic nursery container with bottom drainage holes, you can lift individual pots out whenever it is time to water. Keeping plants inside individual plastic nursery pots allows for easy removal during watering and prevents pooling moisture inside the box.
When you water plants outside the bread box planter, you eliminate standing water entirely. You take each nursery pot to the sink, soak the soil thoroughly, allow excess water to run out for 10 to 15 minutes, and return the pot to its saucer inside the bread box. This routine guarantees that roots never sit in stagnant puddles and your vintage box never suffers from mineral staining or rot.
Direct planting inside a bread box planter is possible with a leak-proof plastic liner. Instead of drilling holes that damage collectible boxes, plant directly only inside a fitted, waterproof plastic liner (a cut-to-size plastic storage bin or a rigid plastic tray). Add a 1-inch layer of leca or pea gravel under the soil, use a light potting mix, and water in small amounts so excess never pools.
To direct plant using a liner, follow these steps:
- Measure the interior of your bread box and cut your plastic liner to fit, allowing the edges to sit slightly below the rim.
- Fit the liner snugly on the floor of the bread box, ensuring it lies flat without wrinkles that could trap water.
- Add the drainage layer—place a 1-inch layer of leca or pea gravel, then fill with a light, well-draining potting mix.
- Plant and water lightly—position your houseplants in the liner and water sparingly, allowing excess to drain through the gravel without pooling.
This method is reliable when managed correctly and avoids permanent modifications to your bread box planter.
Step-by-Step Guide to Assembling a Bread Box Planter
Follow these detailed steps to build your own gorgeous tabletop plant arrangement. This method relies on the non-destructive drop-in technique, preserving your antique container while guaranteeing healthy houseplant growth.
Step 1: Clean and Prepare the Container
Preparing the base of your bread box planter starts with thorough cleaning. Vintage bread boxes frequently harbor old breadcrumbs, grease splatters, or light surface oxidation. Wipe down the interior and exterior using warm water, a mild dish soap, and a soft microfiber cloth. Avoid abrasive scouring pads that could scratch vintage lettering or lithograph finishes. Allow the container to dry completely in a well-ventilated area for at least two hours.
Step 2: Apply a Protective Sealer
Sealing the interior of your bread box planter creates a critical barrier against stray water drops. Applying a protective clear acrylic or enamel spray coating, such as Krylon Clear Acrylic Sealer or Rust-Oleum Crystal Clear Enamel, helps prevent rust and moisture damage on vintage metal containers. Mask the exterior graphics with painter’s tape and paper, then apply two light, even coats across all interior surfaces, paying special attention to seams and corners. Let it cure fully according to the manufacturer’s label instructions.
If your box is wood: Lightly sand the raw interior with fine-grit sandpaper, then apply two to three thin coats of water-based polyurethane or marine-grade clear sealer. Allow full cure per the label (often 24 hours or more). For wooden bread boxes, also add a plastic tray liner on the floor before placing saucers. The finish should only go on the interior and be tested on a hidden spot first.
Step 3: Install Leak-Proof Drip Saucers
Adding protective saucers keeps your bread box planter completely dry. Measure the interior base of your bread box and select shallow, heavy-duty plastic saucers that sit flat along the bottom. For a long, narrow bread box, a single rectangular boot tray or bonsai humidity tray trimmed to size works wonderfully. Place a waterproof silicone mat beneath the plastic saucers to prevent minor condensation from contacting the metal or wooden floor. Check beneath it after each watering so no water is trapped.
Step 4: Pot and Arrange Your Plants
Selecting nursery pots that fit inside the bread box planter ensures that foliage peeks out attractively above the rim. Choose three or four complementary houseplants in plastic containers that match the depth of your bread box. When plants outgrow their starter pots, moving up to a pot only one to two inches larger in diameter prevents excess soil from impeding root hydration. Arrange the tallest plants toward the rear and place trailing species near the front corners so their vines spill over the open lid.
Step 5: Conceal Pots with Natural Dressing
Finishing touches make your bread box planter look lush and cohesive. While the plastic nursery pots provide functional drainage, leaving them exposed looks unfinished. Tuck loose clumps of preserved Spanish moss, green sheet moss, or coconut coir around the rims and in the gaps between pots. This decorative top-dressing hides the plastic containers completely, giving the impression that your plants are growing directly out of a lush, unified garden bed.
Step 6: Secure the Lid Position
Positioning the lid of your bread box planter properly ensures your plants receive adequate natural light and constant airflow. If your bread box features a roll-top door, slide it open fully or leave it half-retracted as a decorative backdrop. For hinged front-drop or top-opening lids, ensure the hinge mechanism is stable. If a hinged lid will not stay up, prop it open with a small stick-on bumper or remove the lid and display it beside the planter.
Best Plant Combinations for an Indoor Bread Box Planter
Creating an appealing tabletop display requires choosing plants that share identical lighting, temperature, and moisture preferences. Mixing a drought-loving succulent with a moisture-hungry fern in the same enclosed planter will inevitably lead to plant decline. Here are three reliable houseplant combinations tailored to specific room environments.
1. The Low-Light Kitchen Nook Recipe
A low-light bread box planter thrives with cast iron plants, snake plants, and pothos. If your kitchen counter sits several feet away from windows, select hardy species that tolerate subdued lighting without stretching or losing their color.
- Snake Plant (Sansevieria trifasciata): Provides vertical height and architectural structure at the back of the box.
- Cast Iron Plant (Aspidistra elatior): Offers broad, deep-green foliage that handles fluctuating room temperatures effortlessly.
- Heartleaf Philodendron (Philodendron hederaceum): Softens the hard metal edges by trailing down the front of your bread box planter.
Water when the top 1 to 2 inches of soil are dry. The philodendron may need slightly more frequent watering than the snake and cast iron plants, so consider pulling it out separately to water more often.
2. The Bright Indirect Light Display
For sunny kitchens, a bright-light bread box planter works wonderfully with vibrant, textured tropicals. Place this arrangement in a room with generous eastern or filtered southern exposure, setting it three to four feet back from direct rays.
- Golden Pothos (Epipremnum aureum): Fast-growing vines with creamy gold marbling that drape elegantly over the container edge.
- Peperomia obtusifolia (Baby Rubber Plant): Sturdy, glossy leaves that fill the middle tier with compact, bushy green texture.
- Pilea Peperomioides (Chinese Money Plant): Distinctive round coin-shaped foliage that adds playful, modern shapes to the arrangement.
Check the moisture level weekly. Water when the top inch of soil feels dry to the touch, following proper houseplant watering practices detailed by the University of Minnesota Extension to prevent over-saturation.
3. The Sunny Windowsill Succulent Garden
Designing a succulent bread box planter requires careful attention to moisture, as succulents need very bright light. Reserve this arrangement exclusively for south-facing windowsills or areas beneath dedicated LED grow lights. The succulents in this recipe are not suited for low-light locations.
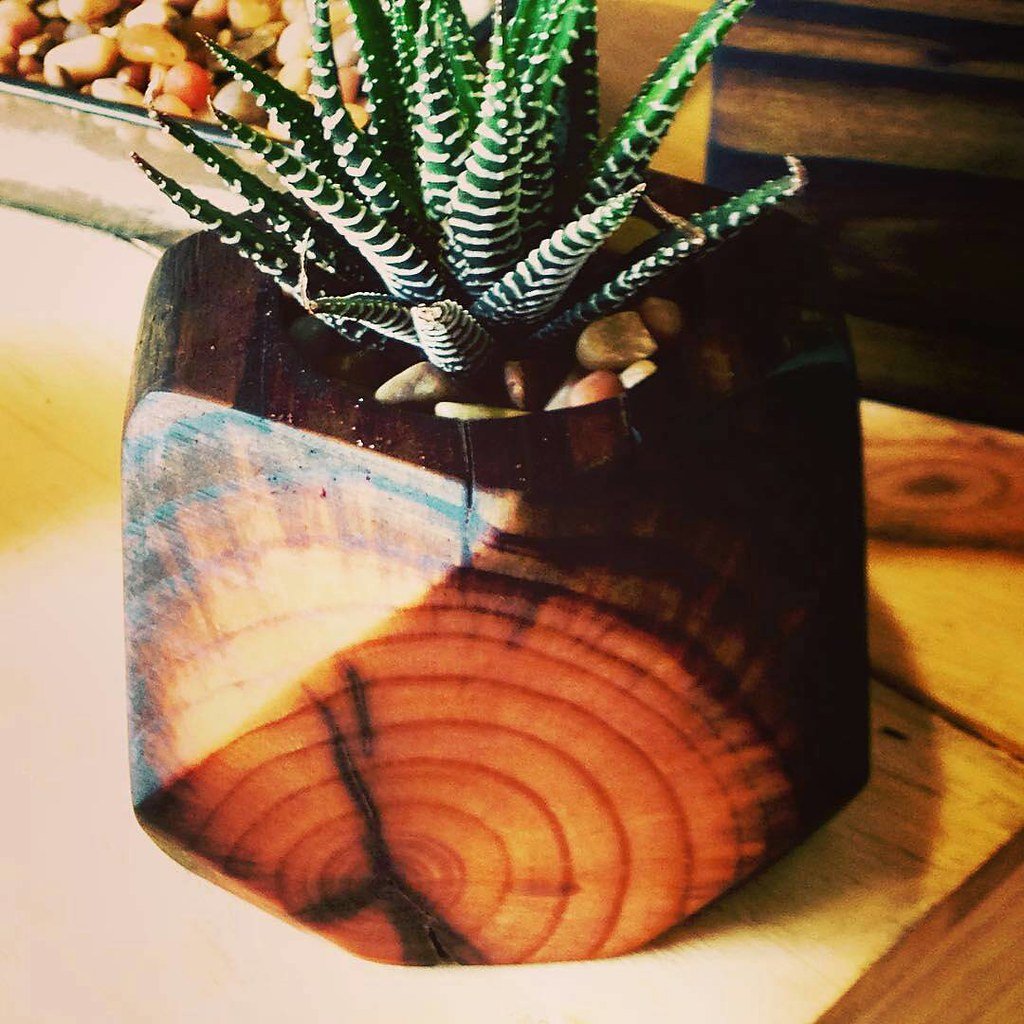
- Haworthia fasciata (Zebra Plant): Tough, striped succulent that stays compact and thrives in shallow container depths.
- Jade Plant (Crassula ovata): Miniature tree-like growth with plump, jade-green leaves that anchors the center of the box.
- String of Pearls (Senecio rowleyanus): Delicate beaded strands that spill gently over the front lip of the bread box planter.
When assembling a succulent collection, place a thin layer of pea gravel in the saucer so the pot sits above any runoff, and make sure the pot base is not sitting in water. Water sparingly, roughly once every two to three weeks during the active spring and summer growing seasons, and reduce hydration further during winter dormancy. Lift the pots out to water them at the sink and let them drain fully before returning them to the box, so no water reaches the metal or wood.
Common Mistakes When Building a Bread Box Planter
Even seasoned crafters run into challenges when converting non-traditional vintage vessels into planters. Avoiding these common pitfalls will keep your indoor garden flourishing for years to come.
Allowing runoff to pool inside a bread box planter is the quickest way to ruin your container. When excess water sits undisturbed inside metal seams or against wooden planks, rust spots and mildew take hold rapidly. Always empty drip saucers 10 to 15 minutes after watering, or remove nursery pots entirely while hydrating your plants.
Trapping humidity by closing the lid of a bread box planter creates fungal issues on plant foliage. Bread boxes were engineered specifically to seal out circulating air to keep bread fresh. However, living houseplants demand regular air exchange. Keep the lid permanently open or securely fixed in an upright position to promote healthy transpiration.
Overpotting starter plants in a bread box planter can lead to root rot. When replanting root-bound houseplants into new nursery pots before placing them into your bread box, avoid jumping to an oversized container. A small root system surrounded by massive volumes of wet soil cannot absorb moisture fast enough, leaving the soil soggy and depriving roots of oxygen.
Water trapped under a saucer or silicone mat can sit against the metal or wood of your bread box planter, leading to hidden damage over time. Lift the pots and check underneath after each watering to ensure no moisture is pooling beneath the saucers or mats.
Mixing plants with clashing watering needs is a common error that leads to plant stress. Do not combine succulents, which prefer to dry out between waterings, with moisture-loving plants such as ferns or calatheas. Group plants by their light and thirst preferences to ensure long-term harmony within your shared tabletop display.
Skipping the clear protective coat on raw metal seams is another costly error. Many antique bread tins have subtle cracks in their interior paint or microscopic rust patches along the crimped base. Taking ten minutes to spray a clear acrylic seal protects the metal from incidental drips and preserves your collectible’s resale value.
For more practical guidance on organizing and styling your living spaces, browse our curated tips for home organization and stylish interior design.
Long-Term Maintenance for Your Bread Box Planter
Maintaining an indoor bread box planter requires a consistent monthly routine to keep both the container and your plants in pristine condition. Because this container sits on high-visibility surfaces, routine upkeep ensures your tabletop centerpiece always looks intentional and clean.
Every four to six weeks, remove each nursery pot from your bread box planter. Inspect the bottom of the container for dust, loose soil particles, or hidden moisture droplets. Wipe down the interior surface with a dry lint-free cloth. If you notice white mineral efflorescence from hard tap water on your plastic saucers, wash them in a gentle vinegar solution to dissolve calcium scale. Keep vinegar on plastic saucers only; wipe the bread box itself with a dry or barely damp cloth.
Check roots every 12 to 18 months. Repot fast growers like pothos into a pot one size up (1 to 2 inches wider) in spring, and slow growers like snake plants every 2 to 3 years.
Each month, look for orange spots or bubbling paint on metal. Lightly remove surface rust with fine steel wool, wipe dry, and touch up with clear sealer; reseal the interior about once a year.
Inspecting the interior base of your bread box planter prevents hidden leaks before they damage your furniture. At the same time, groom your houseplants by trimming yellowed foliage, pruning leggy vines to encourage bushier growth, and dusting broad leaves with a damp cloth so they can absorb light efficiently.
Rotate your entire bread box planter 180 degrees every two weeks. When tabletop planters face a single light source, plants naturally lean forward toward the window. Regular rotation keeps plant stems growing upright, balanced, and evenly distributed across the entire width of your vintage container.
Real-Life Example: Rescuing a Cluttered Countertop with a Bread Box Planter
Picture Sarah, an apartment renter with limited kitchen counter space who inherited an old tin breadbox from a family member. The metal tin sat near the pantry where mail, loose change, and forgotten snacks quickly piled up, creating visual clutter in an already compact kitchen. Rather than packing the keepsake into storage or drilling holes into a collectible family heirloom, Sarah decided to repurpose it into a living decorative accent.
Sarah deep-cleaned the tin, applied a clear acrylic protective sealer along the inner seams, and lined the base with three shallow plastic drip trays. She then nestled three potted houseplant cuttings—a resilient snake plant, a glossy peperomia, and a trailing pothos—directly inside their individual plastic nursery pots. The newly completed bread box planter kept her counters organized while introducing vibrant natural color to the kitchen nook. The project demonstrated that modular drop-in planting preserves vintage kitchenware while making houseplant maintenance completely mess-free.
Frequently Asked Questions
Can I plant directly into an antique bread box without nursery pots?
Direct planting is not recommended for collectible bread boxes because they lack bottom drainage holes. Without proper drainage, excess irrigation collects at the base of the soil, causing root suffocation and root rot within weeks. Instead, plant directly only inside a fitted, waterproof plastic liner (a cut-to-size plastic storage bin or a rigid plastic tray). Add a 1-inch layer of leca or pea gravel under the soil, use a light potting mix, and water in small amounts so excess never pools. Using drop-in nursery pots preserves your container and keeps plants healthy.
How do I prevent rust inside a metal bread box planter?
Protecting a metal bread box planter requires two simple precautions: sealing the metal and isolating moisture. Clean the interior thoroughly, then spray two light coats of clear acrylic or crystal-clear enamel sealer across all interior seams. Always place heavy-duty plastic drip saucers beneath your pots, and take plants to the sink for watering so no moisture ever pools inside the metal container. Check monthly for early signs of rust and address them promptly.
Which houseplants grow best inside a repurposed bread box?
Houseplants that tolerate average indoor humidity and compact root spaces grow best. Excellent choices include heartleaf philodendron, golden pothos, snake plants (sansevieria), ZZ plants, peperomias, and compact haworthia succulents. Group plants that share identical lighting and watering needs together to ensure long-term harmony within your shared tabletop display.
How do I handle drainage if my bread box doesn’t have holes?
The safest solution is adopting the drop-in nursery pot method rather than modifying the box. House each plant in a standard plastic nursery pot resting on an individual plastic drip saucer. When watering day arrives, lift each nursery pot out, water it at the sink until thoroughly drained, and return it to the bread box once all dripping stops. For direct planting, use a fitted plastic liner with a 1-inch gravel drainage layer.
Can I use a wooden bread box planter without causing wood rot?
Yes, a wooden bread box planter can last for years if you install an impermeable barrier between the wood and your plants. Coat the interior with a water-resistant clear varnish or food-safe wax, place a thick plastic sheet or tray along the floor, and use separate drip saucers under each potted plant to keep water away from the wood. Check beneath saucers and mats after each watering to prevent trapped moisture.
Sources: Inspiration for this upcycling project was drawn from Hunker’s guide on turning a breadbox into a vintage-inspired planter, alongside expert houseplant care guidance from the University of Minnesota Extension and protective finishing tips from Rust-Oleum.