Building a diy jeans planter gives worn denim a productive second life while adding vertical greenery to your home or patio. Repurposing old clothes into hanging wall containers is an affordable craft that requires minimal tools and almost zero gardening experience. By turning discarded back pockets into sturdy planting pouches, you create a rustic focal point that naturally drains excess water.
In this guide, you will learn how to design, assemble, and care for a wall garden display that stays healthy across multiple seasons. Creating a customized diy jeans planter allows every home gardener to showcase their creative crafting spirit while building an eco-friendly vertical oasis.
Vertical gardening continues to gain popularity among apartment dwellers, balcony growers, and homeowners with limited ground space. A compact vertical container lets you cultivate culinary herbs, trailing sedums, and leafy foliage right against an empty fence or wall. Exploring creative DIY projects like this allows you to customize your living space while reducing household textile waste.
Instead of discarding frayed blue jeans, you can transform them into functional wall art with distinct character. Every completed diy jeans planter turns neglected vertical surfaces into verdant, eye-catching herb displays.
While the concept looks straightforward, crafting a long-lasting diy jeans planter requires thoughtful preparation. Untreated cotton fabric absorbs moisture rapidly, which can lead to wall staining, water damage, or mold growth if mounted incorrectly. Fortunately, adding simple moisture barriers and choosing the right soil blend eliminates these common pitfalls.
Whether you want a compact single-pocket accent or a full living wall, our instructions will walk you through every step of assembling a secure, durable diy jeans planter.
Why a DIY Jeans Planter Is the Ideal Upcycling Project
Old blue jeans are made of rugged, tightly woven twill cotton engineered for heavy work and enduring wear. Even when knees split or hems fray beyond repair, the rear pockets usually remain in pristine condition. Using these pre-stitched pockets for a diy jeans planter takes advantage of industrial-grade bar-tack stitching and reinforced seams that would take hours to sew from scratch. As a rewarding craft, a sturdy diy jeans planter repurposes durable workwear into functional backyard art.
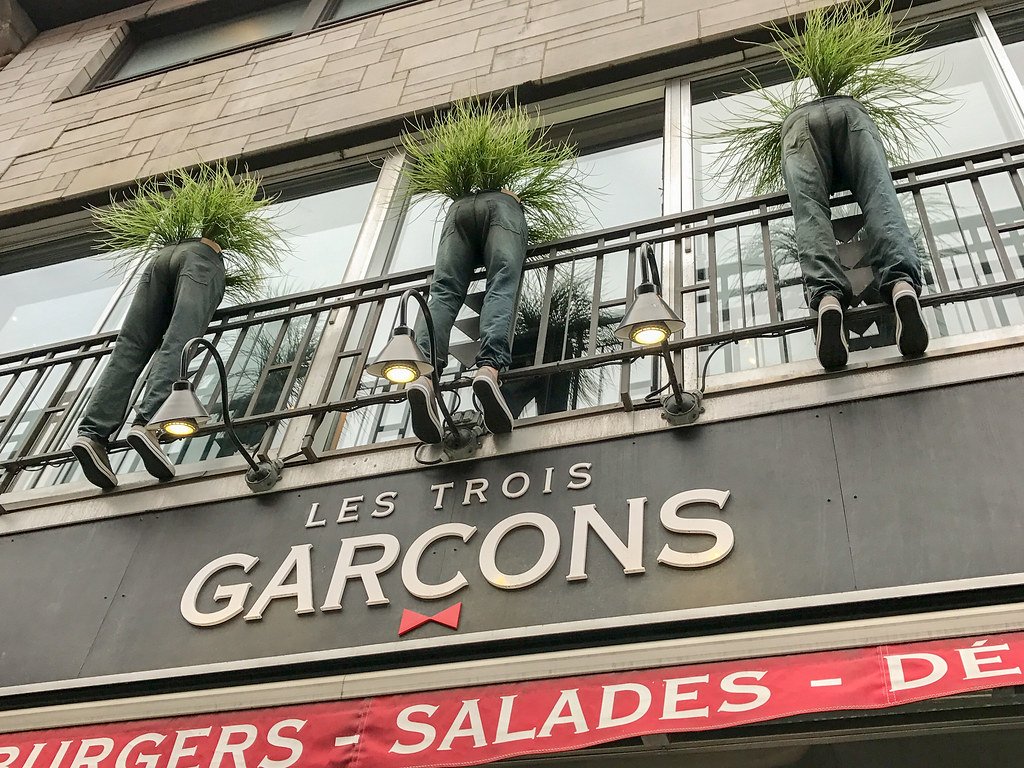
Textile waste remains a major challenge in modern waste management, with millions of tons of discarded clothing ending up in landfills annually. Choosing to upcycle worn denim into an outdoor denim planter diy keeps durable organic materials in active circulation. Repurposing tough cotton fabric also saves you the expense of purchasing plastic hanging nursery pots or manufactured wall pockets that often crack under direct summer sunlight.
If your trousers have severe tears or ripped knees, you do not need to worry about structural flaws. Crafting around natural fraying or intentional diy holes in jeans adds genuine vintage texture to the finished display. The reinforced back pocket remains intact even if the pant legs are completely shredded. A completed diy jeans planter showcases both your gardening flair and your dedication to sustainable home crafting.
Beyond aesthetics, denim offers functional benefits that conventional plastic containers cannot match. Cotton twill breathes naturally, allowing plant root zones to access ambient oxygen far more readily than solid ceramic or resin pots. Furthermore, denim fabric is naturally permeable and lets excess water seep through, eliminating the necessity for puncturing drainage holes, according to Hunker. This natural porosity creates an optimal root environment for species that despise standing water, making every diy jeans planter an ideal home for drought-hardy plants.
How to Make a Planter Out of Old Jeans: Materials and Budget
One of the best aspects of this craft is its low barrier to entry. Most crafters already have the primary supplies sitting in their closets or garage workshops. Using scrap wood and materials you already own, the project can cost $0–$25. Buying everything new could reach roughly $40–$50, depending on the wood scraps and mounting hardware you already own. Building an attractive diy jeans planter proves that functional home gardening does not require expensive store-bought equipment.
Gather the following materials before cutting into your fabric:
- Old denim jeans ($0–$5): One or two pairs of adult blue jeans with intact back pockets. Heavyweight cotton denim (10 to 14 ounces) provides better durability than thin stretch jeans containing high spandex percentages.
- Backer mounting board ($0–$8): A scrap piece of cedar, redwood, treated pine, or exterior plywood measuring roughly 12 by 24 inches.
- Moisture barrier film ($0–$4): 6-mil polyethylene plastic sheeting, pond liner remnants, or marine-grade vinyl to protect the mounting surface.
- Heavy-duty staple gun and staples ($0–$5): 3/8-inch or 1/2-inch stainless steel or galvanized staples to resist outdoor rust.
- Outdoor wood sealant ($0–$6): Clear exterior spar urethane, boiled linseed oil, or water-resistant exterior paint.
- Lightweight potting mix ($4–$8): A blend of peat moss or coco coir, perlite, and organic compost formulated for container gardening.
- Shallow-rooted starter plants ($0–$12): Cuttings from existing succulents, indoor houseplant cuttings, or small nursery herb plugs.
- Mounting hardware – D-rings, spacers, screws or anchors ($4–$12): Hardware needed to securely attach your planter to walls, fences, or railings.
For tools, you only need heavy fabric shears or a rotary cutting wheel, a cordless drill with driving bits, a measuring tape, and wall anchors suited to your exterior surface. Keeping these tools organized alongside other essentials in stylish furniture and decor stations makes weekend craft assemblies fast and enjoyable. When your workspace is prepared, constructing a diy jeans planter takes less than two hours from start to finish.
Comparing DIY Jeans Planter Mounting Methods
Selecting the appropriate mounting foundation ensures your hanging garden remains stable under the weight of wet soil and growing roots. Depending on where you intend to display your vertical arrangement, several mounting methods offer distinct advantages. Preparing a secure base for your diy jeans planter also determines how effectively you can protect underlying walls from dampness.

According to Hunker, pockets can be mounted either directly into a wall using nails at each corner or stapled together onto a sealed wooden board. While direct wall mounting works for rough wooden garden sheds, mounting onto a standalone wooden backer board or wire trellis is far superior for finished walls, stucco, and apartment balconies. The table below compares the five most popular mounting frameworks for a diy denim planter.
| Mounting Method | Ideal Location | Installation Difficulty | Estimated Cost | Moisture Protection Level |
|---|---|---|---|---|
| Sealed Wood Backer Board | Exterior siding, drywall, wooden deck railings | Easy (Basic drilling & stapling) | $5 – $12 | High (When paired with rear plastic barrier) |
| Masonry Anchors (Sleeve / Wedge) | Solid brick, poured concrete, stone walls | Moderate (Hammer drill & anchor setting) | $6 – $14 | High (With standoff spacers & moisture barrier) |
| Direct Wall Fastening | Rustic wooden sheds, unfinished fence posts | Very Easy (Hammer and exterior nails) | $0 – $3 | Low (Moisture transfers directly to surface) |
| Welded Wire Trellis / Grid | Balcony railings, open brick patios | Moderate (Zip ties or S-hooks) | $8 – $16 | Maximum (Complete open-air rear ventilation) |
| Hanging Dowel / Rope Ladder | Sheltered porches, indoor curtain rods | Moderate (Drilling & cord knotting) | $4 – $9 | Moderate (Requires back vinyl flap) |
For indoor walls and painted home siding, the sealed wooden board remains the gold standard. It provides rigid support, keeps multiple pockets neatly aligned, and allows you to install wall standoffs that promote air circulation. If you want maximum airflow on a balcony railing, hanging individual pouches from a coated metal grid creates a lightweight denim planter diy that dries rapidly after heavy rains.
When fastening directly into brick, stone, or poured concrete foundations, outdoor masonry hardware such as sleeve or wedge anchors provides vastly superior holding power compared to traditional wood screws or lightweight plastic plugs. Comparing these fastening approaches ensures your heavy installation will never shear or pull loose unexpectedly from masonry facade surfaces.
No matter which mounting strategy you select, always calculate the wet weight of your planter. While dry fabric and potting mix weigh very little, water-soaked soil adds considerable mass. A multi-pocket diy jeans planter holding four or five mature herbs can easily weigh eight to twelve pounds after thorough watering. Using proper wall anchors or heavy-duty outdoor screws prevents accidental falls.
Jean Pocket Wall Planter Moisture Protection and Wall Safety
The single greatest mistake beginners make when creating a jean pocket wall planter is mounting wet fabric directly flush against wooden fences or painted walls. Denim is made of hydrophilic cotton fibers that naturally pull water outward through capillary action. When wet denim rests against siding or drywall, lingering dampness causes peeled paint, fungal wood rot, and dark mold stains within a few weeks.
Solving this issue requires a dependable dual-barrier moisture mitigation system. First, you must install an impermeable plastic or vinyl membrane between the back of the denim pocket and the wooden backer board. Cutting a small piece of 6-mil polyethylene sheeting or flexible pond liner to fit behind the pocket stops water from soaking straight into the mounting timber of your diy jeans planter.
Second, ensure the backer board itself does not touch the wall directly. Adding half-inch rubber spacers, nylon washers, or a simple wooden French cleat creates a continuous air gap behind the board. This chimney effect permits fresh air to circulate freely behind the display, rapidly evaporating stray droplets. Practicing consistent home maintenance and cleaning around outdoor fixtures protects your property from costly moisture repairs.
If you plan to hang your diy jeans planter indoors, line the inside bottom of each denim pouch with a shallow, flexible plastic tray or nursery liner. This internal cup catches surplus water before it seeps through the front stitches, preventing messy drips onto your interior floorboards. Outdoor units, by contrast, benefit from denim’s open breathability as long as the backing barrier shields your home’s structural siding.
6 Simple Steps: Crafting Your DIY Jeans Planter
Transforming cast-off trousers into a lush living wall takes only six straightforward steps. Follow these detailed steps to build a rugged, attractive diy jeans planter designed for longevity and easy plant maintenance.
Step 1: Cut out the pockets correctly. Lay your jeans flat on a sturdy work surface with the back pockets facing upward. Denim pockets should be cut out leaving both the front pocket and the rear backing fabric intact to form an enclosed pouch without cutting the perimeter seams, according to Hunker. Use sharp fabric shears to cut through both layers of cloth approximately one-half inch outside the outer seam line.
Step 2: Seal and prepare the backer board. Measure and cut your scrap wood board to fit the number of pockets you wish to display. Sand down rough splintered edges, then coat all sides and edges with two layers of exterior spar urethane or water-resistant exterior deck stain. Allow the finish to dry completely for twenty-four hours. Sealing the timber prevents wood warping and decay when exposed to wet soil in your diy jeans planter.
Step 3: Attach the rear moisture barrier. Cut your heavy-duty plastic sheeting or marine vinyl slightly smaller than the backer board dimensions. Staple the waterproof liner firmly to the front face of the sealed timber using galvanized staples spaced two inches apart. This protective barrier ensures that damp denim never transfers trapped water into the wood grain of your diy jeans planter.
Step 4: Secure the pockets onto the board. Arrange your prepared denim pockets on top of the plastic-covered board in your preferred layout. You can align them in symmetrical columns or stagger them for a dynamic cascading effect. Drive heavy-duty staples through the outer fabric margin at the top corners and along the bottom and side seams. Keep the top opening wide and accessible so you can insert soil and plants without stretching your diy jeans planter.
Step 5: Mount wall standoffs and hanging brackets. Flip the board over and screw two heavy-duty D-ring hangers or a bevel-cut French cleat near the upper edge. Fasten three-quarter-inch rubber bumpers or nylon washers to the four rear corners. These spacers guarantee the essential ventilation gap between the wall and your diy jeans planter. Fasten corresponding screw anchors securely into your exterior masonry, fence post, or balcony railing.
For brick or concrete, drill with a masonry bit and use sleeve or wedge anchors rated well above the planter’s wet weight. Into wood fences use exterior-rated screws into studs or posts. Renters should get landlord permission before drilling, and anyone unsure about hanging heavy loads from balcony railings or load-bearing structures should consult a professional.
Step 6: Fill pouches with soil and starter plants. Moisten your potting mix lightly before filling each pouch about two-thirds full. Gently tease the root ball of your chosen seedling or succulent cutting, tuck it into the denim opening, and firm additional soil around the base. Water gently around the plant roots until the soil settles. Congratulations, your handcrafted diy jeans planter is now ready to flourish.
Best Plants for a Jeans Pocket Vertical Garden
Choosing compatible plant species represents the difference between a thriving vertical tapestry and withered foliage. Denim pockets hold a restricted volume of soil, usually between one-half to one cup of growing medium. Jean pocket planters work best when paired with shallow-rooted plant varieties, such as miniature herbs or succulents, according to Hunker. Selecting plants adapted to compact spaces keeps your diy jeans planter lush and vigorous.
Culinary herbs that tolerate shallow soil and moderate drying cycles perform exceptionally well in a sunny jeans pocket vertical garden. Excellent candidates include:
- Creeping Thyme: Forms dense, fragrant mats of miniature foliage with delicate purple blooms.
- Chives: Compact upright bulbs that produce edible hollow stems and pink ornamental blossoms.
- Dwarf Oregano: Tolerates quick soil drainage and thrives with regular kitchen clipping.
- Curled Parsley: Shallow fibrous root system that creates bright emerald ruffles across the pocket rim.
For low-maintenance greenery that requires minimal hydration, hardy succulents and sedums are unbeatable. Varieties like burro’s tail (Sedum morganianum), string of pearls (Senecio rowleyanus), and hens and chicks (Sempervivum) store water in their fleshy foliage. They tolerate the rapid moisture loss characteristic of cotton twill, making them ideal partners for any outdoor diy jeans planter.
For trailing houseplants that add graceful vertical interest to indoor pockets, consider pothos, heartleaf philodendron, and spider plants. These foliage varieties thrive in bright, indirect light and need less sun than herbs or succulents. Keep them away from hot, direct afternoon sun, which can scorch delicate leaves. Indoor foliage plants bring a touch of the outdoors inside while complementing your home’s interior design.
Denim pockets also excel as nursery starters for early plant development. The compact fabric pouches can be utilized as propagation stations for rooting cuttings of varieties like spider plants or begonias, according to Hunker. You can tuck fresh node cuttings directly into moist perlite-rich soil inside the pocket until robust root networks develop, then transplant them into larger permanent pots.
Conversely, you should avoid planting aggressive specimens with deep taproots or heavy water requirements. Vegetables like tomatoes, carrots, or standard rosemary will rapidly become root-bound in a tiny pocket. Fast-growing plants will deplete nutrients within weeks, leaving the foliage stunted. Match your botanical selections carefully to the pouch dimensions so your diy jeans planter maintains balanced root health.
Soil Mix and Watering Schedules for a DIY Jeans Planter
Standard garden topsoil taken from outdoor ground beds is far too dense for small fabric pouches. In a compact diy jeans planter, garden dirt compacts like concrete after repeated watering, suffocating fine feeder roots and blocking drainage. Instead, mix a lightweight, porous potting medium specifically formulated for container culture. Supplying high-aeration soil ensures your diy jeans planter maintains healthy drainage channels.
University extension experts recommend loose, well-draining substrate blends for small container gardening to ensure adequate porosity (Colorado State University Extension container gardening guidelines). Combine about 50 percent quality potting soil or coco coir, 25 percent coarse perlite or pumice, and 25 percent aged compost or worm castings. For succulents, use 50 percent cactus mix and 50 percent perlite or pumice and skip the compost.
Because denim breathes so effectively, water evaporates through the fabric surface much faster than through glazed pottery. In hot summer weather, a hanging diy denim planter may dry out completely within twenty-four to forty-eight hours. Outdoor herbs in summer: check daily and usually water every 1–2 days. Succulents and string of pearls: water only when the mix is dry through the pocket, about every 7–14 days. Pothos indoors: about once a week. In spring, fall and indoors, cut watering back by roughly half.
To prevent dirty water runoff from cascading down your wall, water your diy jeans planter using a narrow-spout watering can or a squeeze condiment bottle. Direct the stream right at the plant base rather than splashing the outer fabric. Apply water slowly in brief pulses, letting the soil sponge up the moisture before adding more. This controlled technique prevents dark compost stains from bleeding across the outer denim pocket face.
Herb selections in container gardens demand consistent soil moisture monitoring to prevent wilting (Penn State Extension herb gardening recommendations). Check the soil moisture in your diy jeans planter by inserting a fingertip one inch into the pouch. If the mix feels completely dry and chalky, provide a thorough soak. If it feels cool and slightly damp, postpone watering for another day.
Preventing Mildew, Mold, and Odor on Fabric Planters
Whenever organic cotton remains damp in stagnant shade, mildew spores and fungal odors can develop. Maintaining healthy environmental conditions keeps your diy jeans planter fresh, clean, and completely odor-free throughout the growing season. Proper placement and periodic preventive care eliminate bacterial buildup before it starts. Taking proactive hygiene steps ensures your hanging diy jeans planter looks spotless across changing seasons.
Sunlight and airflow are your most powerful allies against mildew formation. Place your diy jeans planter where it gets good airflow and light. For herbs and succulents, aim for 4–6 hours of direct morning or midday sun. Indoor foliage plants need bright, indirect light. Morning sun is especially helpful because it dries early dew from the cotton twill before heat builds up.
If you notice white mineral salts or greenish surface mildew on the outer seams, treat the fabric with a gentle, plant-safe cleanser. Mix one tablespoon of distilled white vinegar with two cups of warm water in a spray bottle. Mist the exterior denim lightly, taking care not to drench the root zone. The mild acidity helps reduce light surface mildew; discard heavily moldy pockets.
For long-term protection, you can also treat the cut outer edges and bottom seams with a breathable fabric beeswax balm or eco-friendly water-repellent spray prior to assembly. Choose a product labeled non-toxic or food-safe, apply it only to the outer face and lower seams, and let it cure fully before planting herbs you plan to eat. Indoors, keep pockets away from humid bathrooms, leave a gap behind them, and empty any drip tray after watering so water does not stand.
Expected Lifespan and Seasonal Care for a DIY Jeans Planter
Understanding the physical longevity of upcycled cotton helps you plan seasonal garden rotations effectively. Because blue jeans are composed of biodegradable natural fibers, an outdoor diy jeans planter exposed to relentless sun and summer storms typically lasts between one and three growing seasons. Over time, soil microorganisms and solar ultraviolet rays naturally break down the organic cellulose threads.
In regions with freezing winter climates, leaving wet soil inside fabric containers causes frost heaving that ruptures cotton stitches. When autumn temperatures dip toward freezing, take your diy jeans planter down from its exterior wall anchors. Harvest remaining culinary herbs or transfer sensitive succulents indoors into tabletop pots to protect them from winter kill.
Once the pockets are empty, brush away dry soil particles and rinse the denim pouches with lukewarm soapy water. Let the entire mounting board dry completely in bright sunlight before storing it in a dry garage, basement, or garden shed. When spring returns, inspect the seams for loose threads, apply fresh wood sealer if needed, and replant your trusty diy jeans planter for another vibrant growing season.
Real-Life Example: Solving Balcony Drainage and Wall Protection
Picture Sarah, a renter living in a third-floor apartment who wanted to cultivate fresh kitchen herbs along her narrow balcony. Lacking floor space for bulky ceramic pots, she decided to assemble a vertical garden using three pairs of retired denim pants. Her initial attempt mounted the raw cut pockets directly against the apartment’s painted stucco exterior wall. Within three weeks of daily watering, muddy runoff stained the rough stucco and small patches of surface mildew appeared behind the soggy pockets.
Recognizing the moisture hazard, Sarah temporarily detached the display and reengineered the setup. She mounted the denim pouches onto a treated cedar board lined with a heavy vinyl barrier, adding one-inch nylon spacers behind the board corners to create an unobstructed air gap. She also switched from heavy topsoil to a quick-draining perlite blend and began watering with a controlled squeeze bottle.
The redesigned diy jeans planter eliminated all wall staining, dried cleanly between waterings, and yielded vibrant thyme and chives all season long. Her experience demonstrates that proper moisture barriers make fabric gardening reliable and tidy in any compact setting. Following Sarah’s thoughtful approach enables anyone to assemble a trouble-free diy jeans planter on a rental balcony.
Frequently Asked Questions
How to Make a Planter Out of Old Jeans?
To make a planter out of old jeans, cut out the back pockets with the rear backing fabric intact to create sturdy pouches. Seal a scrap wooden board with exterior spar urethane, staple an impermeable plastic moisture barrier over the wood, and secure the denim pockets onto the board with heavy-duty staples. Mount the board using wall standoffs, fill the pouches with a perlite-rich potting mix, and insert shallow-rooted herbs or succulents for a thriving diy jeans planter.
How Do You Stop Water From Damaging Walls Behind Denim Planters?
You can prevent wall water damage by affixing a waterproof membrane, such as 6-mil polyethylene plastic or pond liner, directly behind the denim pockets. Furthermore, install rubber spacers or nylon washers behind the mounting board to maintain a half-inch air space between the board and your wall. This ventilation gap allows circulating air to dry any stray moisture quickly, keeping your diy jeans planter safe for painted siding, stucco, and wood fences.
What Soil Mix Works Best for Fabric Planters?
Heavy garden dirt compacts inside fabric pouches, so always use a light, porous container potting mix. Combine about 50 percent quality potting soil or coco coir, 25 percent coarse perlite or pumice, and 25 percent aged compost or worm castings. For succulents, use 50 percent cactus mix and 50 percent perlite or pumice and skip the compost. This blend provides rapid drainage while holding enough moisture to nourish delicate root systems.
How Long Does an Outdoor Denim Planter Last?
A well-constructed outdoor denim planter typically lasts one to three full growing seasons. Heavyweight cotton twill withstands rain and sun admirably, but exposure to soil microbes and UV rays will eventually degrade the organic threads. To extend its lifespan, bring the planter into a dry shelter before winter freezing, rinse the pockets annually, and avoid using thin stretch denim containing high percentages of synthetic elastane.
Can You Use Jeans Pockets for Plant Propagation?
Yes, compact denim pockets make outstanding propagation stations for rooting cuttings of varieties like spider plants, pothos, or begonias, according to Hunker. The breathable cotton fabric prevents soggy water accumulation around fragile new root nodes. Keep the potting substrate lightly misted until roots anchor firmly, then allow the plant to mature in place or transfer it into a larger garden container.
Sources
Crafting sustainable garden containers from repurposed clothing blends practical utility with eco-conscious home design. The creative pocket concept in this guide was inspired by a feature on vertical denim gardening published by Hunker. For additional horticultural insights regarding container substrate formulation and herb care, explore practical guidelines provided by Colorado State University Extension and container culture research from Penn State Extension. With proper moisture separation and balanced soil, your diy jeans planter will provide healthy greenery season after season.