Transforming an empty prescription container into a rustic pill bottle vase is one of the most rewarding ways to repurpose plastic containers that would otherwise end up in local landfills. With simple surface preparation, bonding primer, and layered acrylic paints, you can turn slick polypropylene medicine bottles into charming faux-wood or ceramic tabletop accents. This guide walks you through every step of crafting durable, weighted bud vases on a budget under $15.
Every year, millions of households accumulate small amber plastic containers from daily prescriptions, seasonal allergy medications, and vitamin supplements. Because recycling facilities struggle with items smaller than three inches, these sturdy containers often get discarded. Crafting a mini pill bottle vase gives that durable plastic a practical second life.
Engaging in creative DIY projects allows you to customize colors, textures, and accents to match your home aesthetic. Whether you prefer weathered barn wood, rustic terracotta, or sleek modern ceramic, making a pill bottle vase is simple, fast, and remarkably affordable.
Why Upcycle a Pill Bottle Vase for Home Decor?
Standard prescription vials are molded from polypropylene, also identified as number 5 plastic. While polypropylene is durable and chemical-resistant, small vials frequently slip through municipal sorting grates at commercial recycling facilities, as highlighted in current EPA recycling guidelines. Repurposing them at home prevents unnecessary plastic waste.
Before starting any diy pill bottle crafts, patient privacy and chemical safety come first. Remove all prescription paperwork and ensure that leftover medications are handled according to FDA medical disposal instructions. Never rinse leftover pills down the sink or discard active pharmaceuticals in household trash.
Once thoroughly cleaned and de-labeled, empty medicine vials offer an ideal cylinder shape for small floral arrangements. Exploring fresh smart home organization and upcycling ideas helps keep clutter out of drawers while introducing handcrafted warmth to your decor. A completed pill bottle vase brings tactile charm to side tables, nightstands, and small display shelves.
In addition to waste reduction, making crafts with pill bottles provides an approachable creative outlet for all skill levels. Because the surface area is small, you can practice faux-finishing techniques without investing in expensive wooden turnings or ceramic supplies.
Materials and Budget for Your Pill Bottle Vase Project
Creating a decorative pill bottle vase does not require expensive specialized art tools. Most crafters already own half of the required items in their utility drawers or medicine cabinets. For the remaining supplies, dollar stores and craft shops provide economical options.
Expect to spend between $5 and $15 for an entire set of finished bud vases. If you already have primer, craft paint, and glue on hand, your out-of-pocket expense can easily stay under $3. Planning your supplies in advance keeps your pill bottle crafts ideas smooth and enjoyable.
| Material / Tool | Primary Purpose | Estimated Retail Price | Budget-Friendly Substitute |
|---|---|---|---|
| Empty prescription vials | Vase structure and container | $0.00 (repurposed) | Spice jars or vitamin bottles |
| Hair dryer | Softens label adhesive | Owned | Hot tap water soak with dish soap |
| Wire cutters or utility shears | Removes child-resistant rim tabs | Owned or $2.50 | Heavy kitchen shears or nail nippers |
| 150 to 220 grit sandpaper | Scuffs slick plastic for adhesion | $2.00 – $3.50 | Emery board or coarse nail buffer |
| Plastic bonding spray primer | Creates a durable base layer | $5.00 – $7.50 | Flat chalk paint mixed with baking soda |
| Acrylic craft paints | Provides base coat color tones | $1.25 – $2.50 per bottle | Leftover interior wall paint samples |
| Antique wax or dark glaze | Produces faux wood grain shading | $4.00 – $6.50 | Diluted brown acrylic craft paint |
| 3-ply natural jute twine | Hides trimmed rims with rustic trim | $1.25 – $2.00 per roll | Hemp cord, cotton yarn, or thin ribbon |
| Play sand or fine gravel | Adds stabilizing base weight | $1.00 – $2.00 | Dried lentils, split peas, or small coins |
| Matte clear coat sealer | Protects paint from handling | $4.50 – $6.00 | Mod Podge matte or diluted white glue |
Gathering these items before you begin ensures that each coat has adequate time to cure properly, resulting in a resilient pill bottle vase that withstands everyday handling.
Plastic Surface Prep: Cleaning Residue and Priming Slick Polypropylene
Polypropylene is a low-surface-energy plastic, which means standard water-based acrylic paint will simply slide off or peel like dried glue if applied directly to the bare amber surface. Proper mechanical and chemical preparation ensures your pill bottle vase retains its paint finish for years.
Start by stripping away paper prescription labels. Heating empty prescription bottles with a hair dryer softens the label adhesive for clean removal. Aim the warm air at the label for roughly 30 to 45 seconds, then lift one corner and peel the sticker away slowly at a 45-degree angle.
Any remaining gummy adhesive can be wiped clean using a cotton ball soaked in isopropyl alcohol or a dab of vegetable oil mixed with baking soda. Wash the vial inside and out with warm water and degreasing dish soap, then let it dry completely.
Next, alter the profile of the container. Prescription bottles have raised locking lugs around the upper rim designed for child-safety caps. Clipping off the child-safety locking tabs on the rim creates a cleaner bottle profile for vase use. Use wire cutters or heavy shears to snip these plastic tabs flush with the rim, then smooth the cut plastic with an emery board.
Once the shape is refined, scuff the exterior of the plastic. Rub 150-to-220 grit sandpaper over the entire outside surface until the plastic turns cloudy and matte. These tiny scratches provide mechanical grip for the bonding primer. Wipe away plastic dust with a clean, dry cloth before undertaking your diy with pill bottles.
Finally, apply a bonding primer formulated specifically for plastics, such as Rust-Oleum Specialty Plastic Primer. Spray two light, misting coats roughly ten inches away from the plastic, waiting ten minutes between passes. Spray outdoors or in a well-ventilated area, follow the can’s label, and let the primer dry per the instructions (usually at least an hour) before painting.
6 Steps to Crafting a Faux-Wood Pill Bottle Vase
Turning a primed plastic cylinder into a convincing turned-timber vessel relies on layering warm base colors and translucent glazes. Follow these six steps in order to build believable wood grain depth on your pill bottle vase.
Step 1: Apply the Opaque Base Foundation
Applying two coats of white chalk paint or spray paint effectively conceals the original amber plastic. The chalk paint creates an ultra-matte, porous surface that accepts secondary pigment washes smoothly. Allow each white coat to dry for 25 to 30 minutes.
Step 2: Paint the Warm Wood Undertone
Brush a mid-tone tan, warm honey, or soft camel acrylic paint over the white base. This tone will represent the core lumber color showing beneath your grain glaze. Apply the paint in continuous vertical strokes from rim to base. Let this layer dry completely for 45 minutes before proceeding with your diy medicine bottle crafts.
Step 3: Brush On Directional Antique Glaze
To produce realistic wood grain, dip a flat, stiff-bristled craft brush lightly into antique wax, dark gel stain, or burnt umber acrylic glaze. Wipe excess product onto a paper towel. Brushing antique wax or glaze in directional strokes with circular swirls mimics natural wood grain and knots. Drag the brush vertically, occasionally introducing a gentle wiggle or small circular twist to create natural wood knots on your pill bottle vase.
Step 4: Soften and Blend the Bristle Marks
Before the glaze sets, use a dry makeup sponge or clean chip brush to lightly feather out harsh edges. Softening the contrast ensures the finish resembles genuine sanded walnut, oak, or cedar rather than painted stripes.
Step 5: Optional Contact Paper Alternative
If you prefer a mess-free alternative to painting, contact paper offers another route. Peel-and-stick wood grain contact paper offers a no-paint route to a faux-wood look. Measure the bottle height and circumference, trim the vinyl sheet with a craft knife, and wrap it smoothly around the bottle, pressing out air pockets.
Step 6: Lock the Finish with Matte Sealer
Seal your painted pill bottle vase with a light mist of matte acrylic spray. The clear coat prevents wax from transferring to your fingers during everyday handling while preserving the rustic, non-reflective luster of unfinished timber.
Advanced Faux Finishes for Every Pill Bottle Vase
While faux wood remains a popular style, you can transform a pill bottle vase with several alternative high-end designer finishes using everyday kitchen and craft ingredients.
1. Textured Tuscan Terracotta
To replicate aged clay pottery, combine two tablespoons of terracotta or warm rust acrylic craft paint with one teaspoon of baking soda. The mixture will puff up slightly into a fluffy, textured paste. Dab the paste onto your primed container using a sea sponge or coarse round brush. As it dries, the baking soda creates an authentic chalky, mineral texture that completely masks the plastic substrate. Seal textured finishes with matte clear coat once fully dry (about 24 hours).
2. Artisanal Speckled Ceramic
Modern stoneware bud vases are popular accent pieces. Paint your bottle in warm ivory, soft greige, or pale sage green matte chalk paint. Once dry, thin a drop of dark brown or charcoal paint with a splash of water. Dip an old toothbrush into the wash, point the bristles at the container, and drag your thumb backward across the bristles. This creates a fine mist of organic speckles across the surface, giving your pill bottle vase an artisanal studio pottery look. Do this over newspaper and wear old clothes.
Pairing these ceramic-style rustic furniture decor accents with natural textures creates an inviting, balanced vignette on floating shelves or bedroom dressers.
3. Weathered Industrial Concrete
For an urban or modern farmhouse aesthetic, mix medium gray acrylic paint with unsanded tile grout, patching plaster, or baking soda. Apply the thick mixture with a palette knife or foam brush, dragging it unevenly across the container to build raised ridges. Once dry, dry-brush a tiny amount of white paint across the high points to highlight the simulated stone texture on your medicine bottle bud vases.
How to Properly Weight and Balance a Pill Bottle Vase
Because empty polypropylene vials are extremely light, even a few dried stems can make the arrangement top-heavy and prone to tipping.
Adding internal ballast is essential for a functional pill bottle vase. Before arranging florals, add one to two tablespoons of clean play sand, fine aquarium pea gravel, or miniature glass floral beads directly into the bottom of the container. This simple addition lowers the center of gravity and keeps the base firmly planted.
If you prefer a permanent ballast that will not shift during moving or cleaning, squirt a generous nickel-sized puddle of hot glue or silicone craft adhesive into the bottom of the vial. Immediately pour fine gravel or metal washers into the wet adhesive, pressing them down gently with a pencil eraser. Let the glue cure fully before adding stems or water. If you plan to use fresh water, bury the sand or gravel completely in the cured adhesive so loose particles do not cloud the water.
Another stability technique involves expanding the base footprint. Glue the bottom of your completed pill bottle vase onto a two-inch wooden craft disc, a thick round cork coaster, or a wide metal washer painted to match the body. Expanding the base diameter prevents tipping even when displaying taller botanical stems.
Fresh Stems vs. Faux Florals: Water Guidelines and Sealing
Because the plastic itself holds water well, displaying fresh cut flowers in a painted pill bottle vase requires a few specific precautions to protect the decorative exterior.
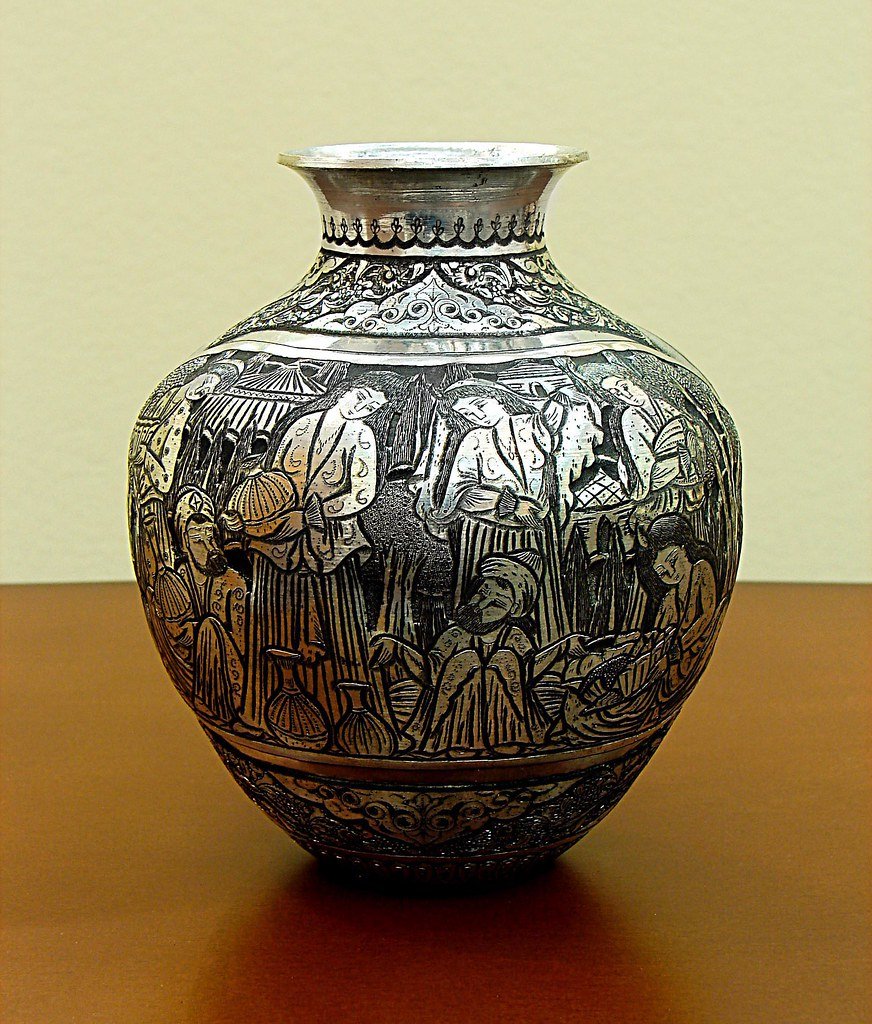
Water splashing over the top rim can seep beneath the acrylic paint layer, causing the primer to bubble or peel away from the polypropylene rim. To prevent water damage when using live floral cuttings, coat the interior rim and top half-inch of the inner wall with a brush-on waterproof clear sealer such as Mod Podge Outdoor, applied to the rim and upper inner wall and cured for the time stated on the label (often 24 hours or more) before adding water. Painted exteriors are not fully waterproof, so wipe up spills and do not soak the vase.
When filling your finished medicine bottle bud vases with fresh water, use a small squeeze bottle, narrow-spout watering can, or medical syringe. Pour slowly to keep moisture entirely off the painted outer walls. Change the water every two to three days using a turkey baster or syringe to draw out old water without turning the vase upside down.
For zero-maintenance styling, dried florals and artificial stems remain the safest option. Dried lavender sprigs, bleached bunny tails, mini billy buttons, preserved eucalyptus, and faux maidenhair fern fronds look stunning in a miniature pill bottle vase without requiring a single drop of water.
Decorative Neck Trims and Rustic Accents
The neck and rim of a prescription vial present the clearest reminder of its original medical purpose. Concealing these threaded ridges finishes your project with polished, professional charm.
Jute cord provides an ideal rustic trim. Braiding three strands of jute cord creates a rustic trim that conceals clipped rim edges. Secure one end of the three-strand braid with a tiny dot of hot glue just below the top rim, wrap it snugly around the neck, and trim the excess cord at an angle before gluing the tail in place.
You can also experiment with single-strand jute wraps, natural cotton baker’s twine, or thin raffia ribbon. For a modern Scandinavian look, leave the rim bare and sand the plastic smooth, painting it in a solid contrasting accent color like matte black or brushed gold.
Another popular trim option involves wrapping fine 24-gauge copper jewelry wire around the neck four or five times, leaving a small loop to hang a stamped cardstock botanical tag. These thoughtful details turn basic ways to use pill bottles into cherished handcrafted gifts for friends and family.
Troubleshooting Common Pill Bottle Vase Mistakes
Even straightforward upcycling projects can run into small challenges. Here is how to diagnose and resolve six common issues when making your pill bottle vase.
1. Paint Flakes or Peels Off When Handled
If paint rubs away easily, the plastic surface was either insufficiently scuffed or primed without a plastic bonding agent. To correct this, gently scrape away loosened paint, buff the exposed polypropylene with 150-grit sandpaper, wipe the area with rubbing alcohol, and re-prime with dedicated plastic bonding primer before touching up your color layers.
2. Antique Wax Stays Sticky and Tacky
Applying wax or gel glaze too heavily prevents the carrier solvents from evaporating properly. Buff the container firmly with a lint-free cotton rag to remove excess surface wax. If the surface remains sticky after twenty-four hours, dust a pinch of cornstarch across the container, buff lightly with a soft brush, and seal with a coat of matte acrylic spray.
3. The Amber Color Bleeds Through the Finish
Translucent craft paints often fail to block the deep amber pigment of prescription plastic, creating a dingy undertone. Always apply two complete coats of opaque white chalk paint or heavy-body titanium white acrylic before adding your decorative wood or ceramic tones to your diy with pill bottles.
4. Sharp Plastic Burrs on the Cut Rim
Clipping child-safety tabs with dull scissors can leave sharp, jagged plastic protrusions that snag twine or scratch fingers. Use a coarse emery board or fine metal file to sand down the cut sections until the circumference feels completely smooth to the touch.
5. The Vase Tips Over with Taller Florals
If your floral cuttings cause the arrangement to sway, your ballast is too light. Empty the botanicals and add heavier stainless steel washers or glass marbles embedded in hot glue or silicone (avoid plain steel, which rusts, and keep small weights away from young children and pets.) before reinserting the sand and stems. Ensuring adequate weight is critical for a durable pill bottle vase.
6. Uneven or Streaky Coats
Thick paint pools and streaks on a slick cylinder. Sand the dried ridges lightly with 320-grit paper, then apply thinner coats, rotating the bottle on a dowel or pencil while painting.
Real-Life Example: Crafting a Cohesive Pill Bottle Vase Trio
Here is an example: imagine a budget decorator named Sarah who has saved three matching empty prescription vials. Rather than discarding the difficult-to-recycle vials into the trash, she gathered three uniform containers to build a cohesive tabletop display. She trimmed away the child-resistant rim tabs, sanded the slick polypropylene bodies, and applied a dedicated bonding primer.
Using warm camel chalk paint topped with directional strokes of walnut antique wax, she created three distinct mini vessels that mimicked miniature turned-wood pots. After adding fine decorative gravel to anchor each base and securing braided jute around the necks, she grouped them on a wooden tray alongside dried bunny tails. The finished pill bottle vase trio delivered high-end farmhouse charm at virtually zero expense. This shows how proper prep and bonding primer turn common plastic into durable accents.
Creative Display Ideas for Your Finished Pill Bottle Vase Set
Because of their compact scale, these miniature bud vases fit comfortably into small spaces where standard floral arrangements would look overwhelming. Here are creative ways to incorporate your finished vessels throughout the home.
A classic approach is arranging three or five vases in an odd-numbered grouping across a tiered serving tray in the kitchen or dining area. Varying the height of each arrangement by trimming floral stems to different lengths creates visual rhythm and movement.
You can also use a pill bottle vase as a personalized place card holder for rustic dinner parties or holiday gatherings. Tie a handwritten kraft paper name card to the jute neck trim using baker’s twine and place one at each guest’s table setting holding a fresh sprig of rosemary or lavender.
For a fridge or memo board version, use small craft magnets and keep them out of reach of young children and pets, since swallowed magnets are dangerous. Use wall-mounted vases only with dried or faux stems.
Frequently Asked Questions
What to Do with Empty Prescription Bottles?
You can safely repurpose empty prescription containers into small bud vases, travel sewing kits, desk organizer containers for paperclips, or portable first-aid match holders. Before reusing vials, peel off patient labels completely to protect your privacy and wash the plastic thoroughly with warm soapy water. If you choose not to upcycle, utilize pharmacy drop-off boxes for responsible medication and plastic container management.
What to Do with Empty Pill Bottles for Home Decor?
Empty medicine containers make exceptional raw material for DIY home accents. Beyond crafting a faux-wood bud vase, you can spray paint them matte black to hold toothpicks, wrap them in textured sisal rope for rustic storage pots, or make small memo-board planters (use only small craft magnets and keep them away from young children and pets). Their compact, uniform dimensions make them ideal for small decorative vignettes on shelves and side tables.
Are Old Glass Medicine Bottles Worth Money?
Unlike modern polypropylene plastic vials, antique glass medicine bottles from the late nineteenth and early twentieth centuries can hold real collector value. Bottles featuring embossed apothecary lettering, deep cobalt blue or amethyst hues, intact paper labels, and visible pontil scars frequently sell for $10 to $100 or more among vintage collectors. Plain amber bottles without markings generally hold modest decorative value around $2 to $5.
Can a Plastic Pill Bottle Vase Hold Real Water for Fresh Flowers?
Yes, a plastic pill bottle vase can hold real water because polypropylene does not absorb water. However, protect the exterior paint by applying a waterproof clear coat around the rim. Always add water carefully using a narrow-spout squeeze bottle or syringe to prevent liquid from splashing onto exterior acrylic layers, and change the water every two days to keep stems fresh.
Sources
Project inspiration and core crafting methods adapted from Hunker: Paint Old Prescription Bottles for Instant Faux-Wood Mini Vases. Safe pharmaceutical disposal guidelines referenced from the U.S. Food and Drug Administration, and plastic recycling standards referenced from the U.S. Environmental Protection Agency.